Here is how to set up your new Qolsys IQ Panel 4 or IQ4 Hub.
Most people find it’s easiest to use the back stand and sit the panel on a table. If you’re going to mount your panel on the wall then wait until this guide says to physically install it. You can’t return it after you’ve mounted it on the wall.
1. Power It On
First, you need to power on your new panel.
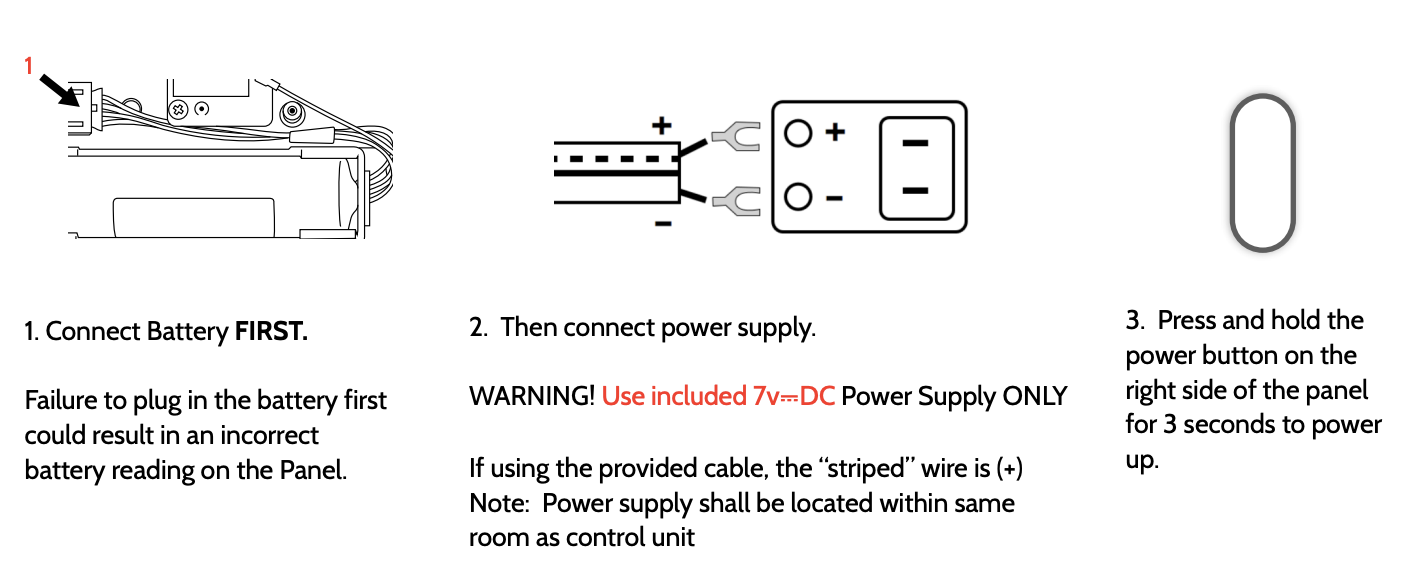
Connect & Charge Battery
Qolsys panels usually ship with the battery disconnected. You’ll need to connect the battery first, and you may even need to give it some time to charge up before the panel will power on. This is normal and expected.
When the panel powers on, it will automatically launch the Easy Installation Wizard. Do not start the wizard yet! Instead, go to Surety System Manager and activate your Alarm.com account first (see Step 2). This will make it easier to get through the installation wizard.
2. Activate Alarm.com Account
Go to Surety System Manager and follow the instructions there to activate your Alarm.com account. If your plan has professional monitoring then you will activate that here as well.
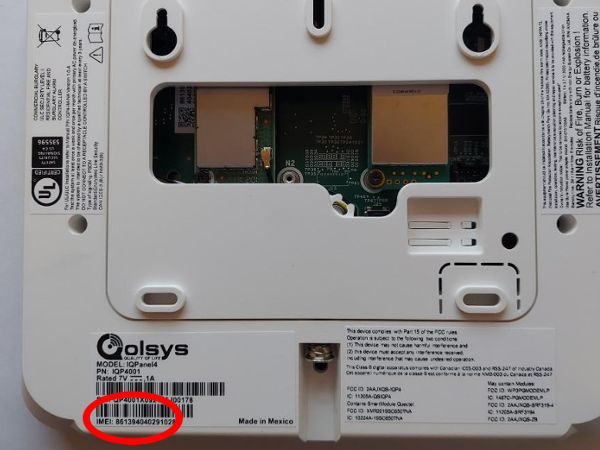
You will need your panel’s IMEI to activate your Alarm.com account. It’s printed on the product sticker on the back of the panel.
When you get to the point where it says to run a cell test or start the installation wizard then go back to the panel and start the installation wizard.
3. Easy Installation Wizard
Now that your Alarm.com account is ready and waiting for your panel to connect, start the Easy Installation Wizard on your panel.
We recommend waiting to physically mount sensors and other devices until after you have added them to the control panel and tested that they work in their desired location.
")
The wizard will guide you through these steps.
- Connect your panel to the internet via Wi-Fi.
- Connect your panel to Alarm.com via cellular.
- Add sensors to your panel. You can skip this step and do it later if you prefer. (PowerG, 319.5 MHz)
- Add smart home devices. You can skip this step and do it later if you prefer. (Z-Wave)
- Pair your phone via Bluetooth. You can skip this step if you prefer.
- Add remote panels or keypads. You can skip this step if not applicable.
- Add users. We recommend skipping this step and adding users in Alarm.com instead.
- Check for IQ Panel 4 software updates.
- Install the Alarm.com mobile app on your phone.
4. Log Into Alarm.com
You can log into your Alarm.com account using either the mobile app installed in the previous step or using a web browser.
Finish Alarm.com Set Up
Once logged in, follow the initial instructions to finish setting up your Alarm.com account and verify your email address.
You will receive an email to verify your primary email address. It’s important to complete this step. Please don’t skip it!
Install Cameras
If you have Alarm.com cameras, you can install them now. Or, if you prefer, you can always install them later by logging into Alarm.com.
Add Users & Logins
Alarm panel users are people who can disarm your alarm system. Add a user for each person who will be allowed to disarm. And give each user a unique user code that only they know.
Alarm.com logins are for people who can access the system remotely using the Alarm.com mobile app and website. Add a login for each person who will be allowed to have remote access.
5. Physically Install Control Panel & Sensors
We recommend waiting until now to physically install your control panel in case something goes wrong and you need to return your panel. If the panel has been mounted on the wall it cannot be returned. It is still covered under warranty.
Test Wireless Communication
Before you permanently install your panel and sensors, first check that it gets a sufficient cellular signal, Wi-Fi signal, and can communicate with all sensors and devices before physically mounting it.
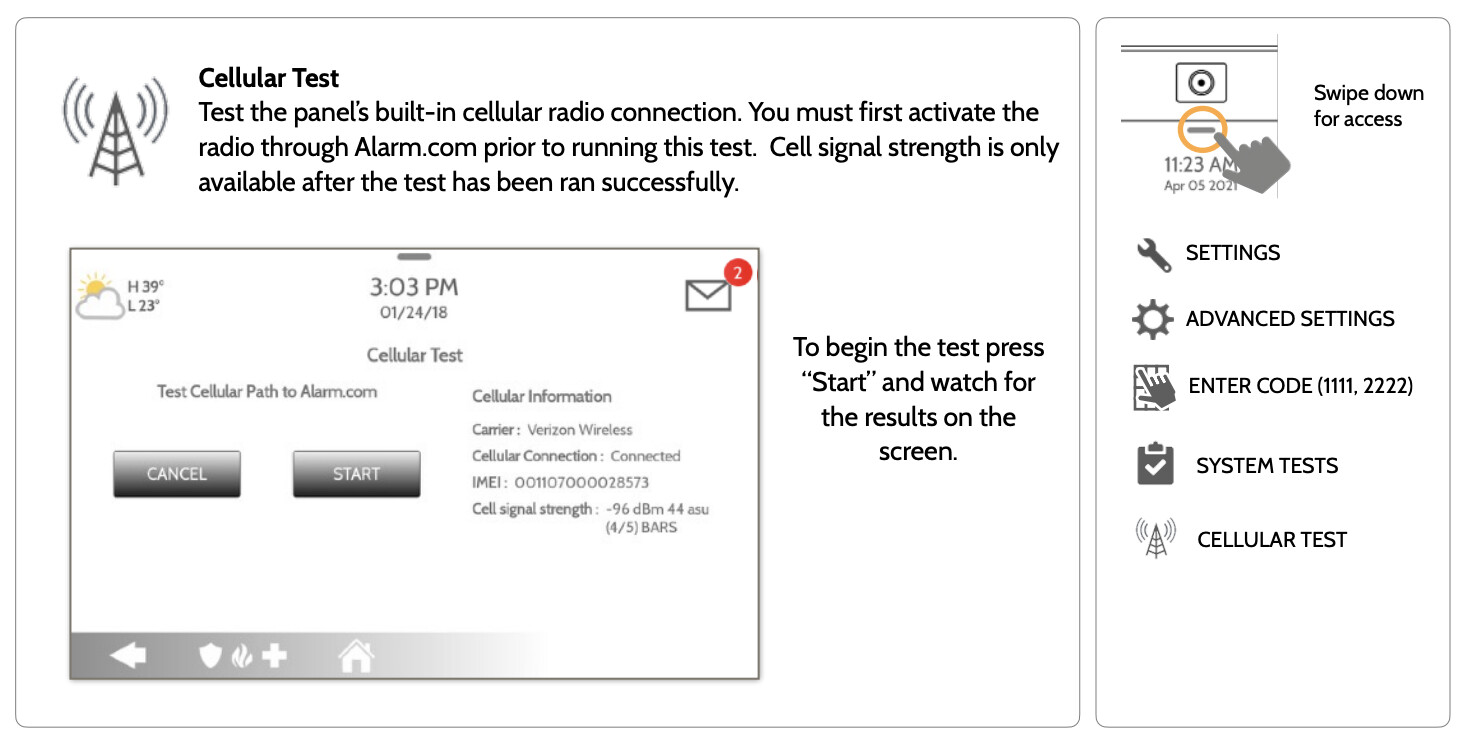
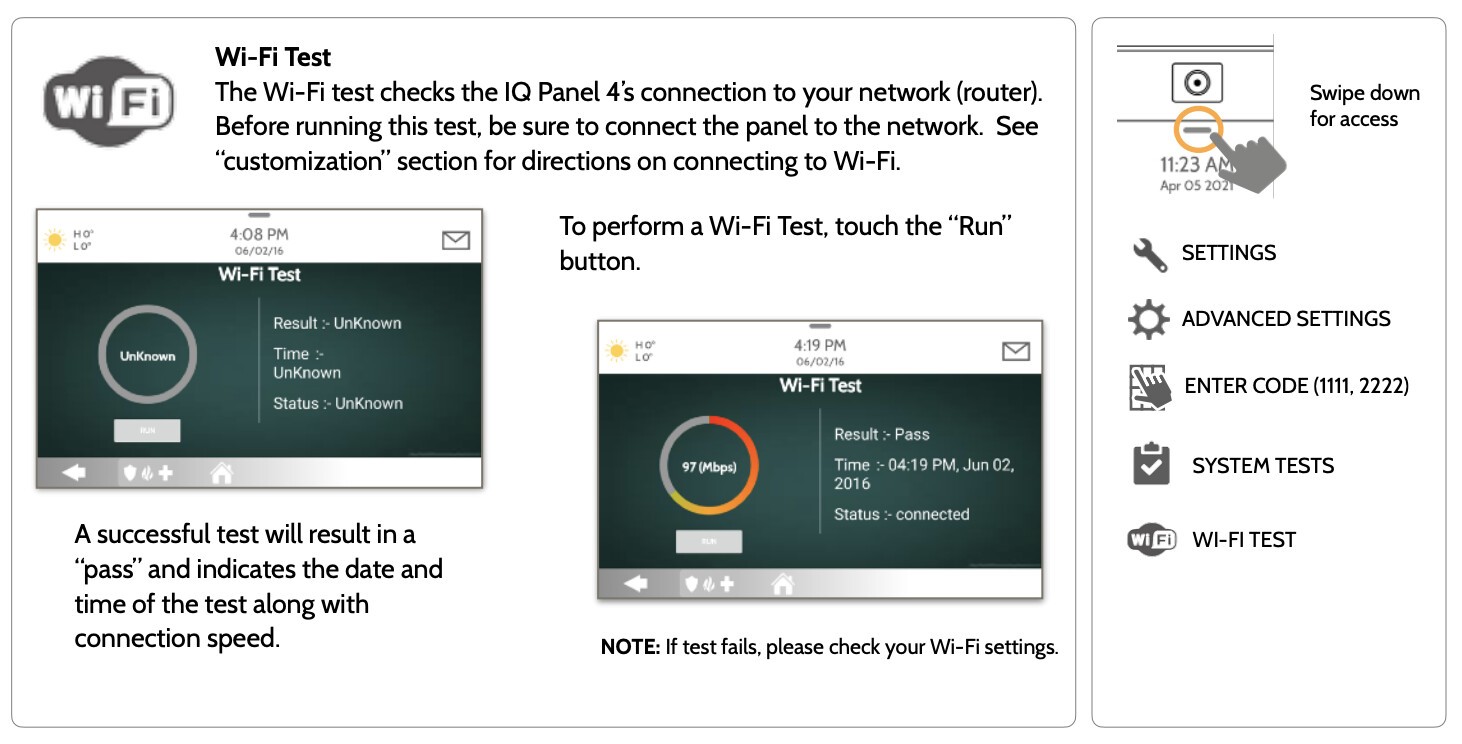
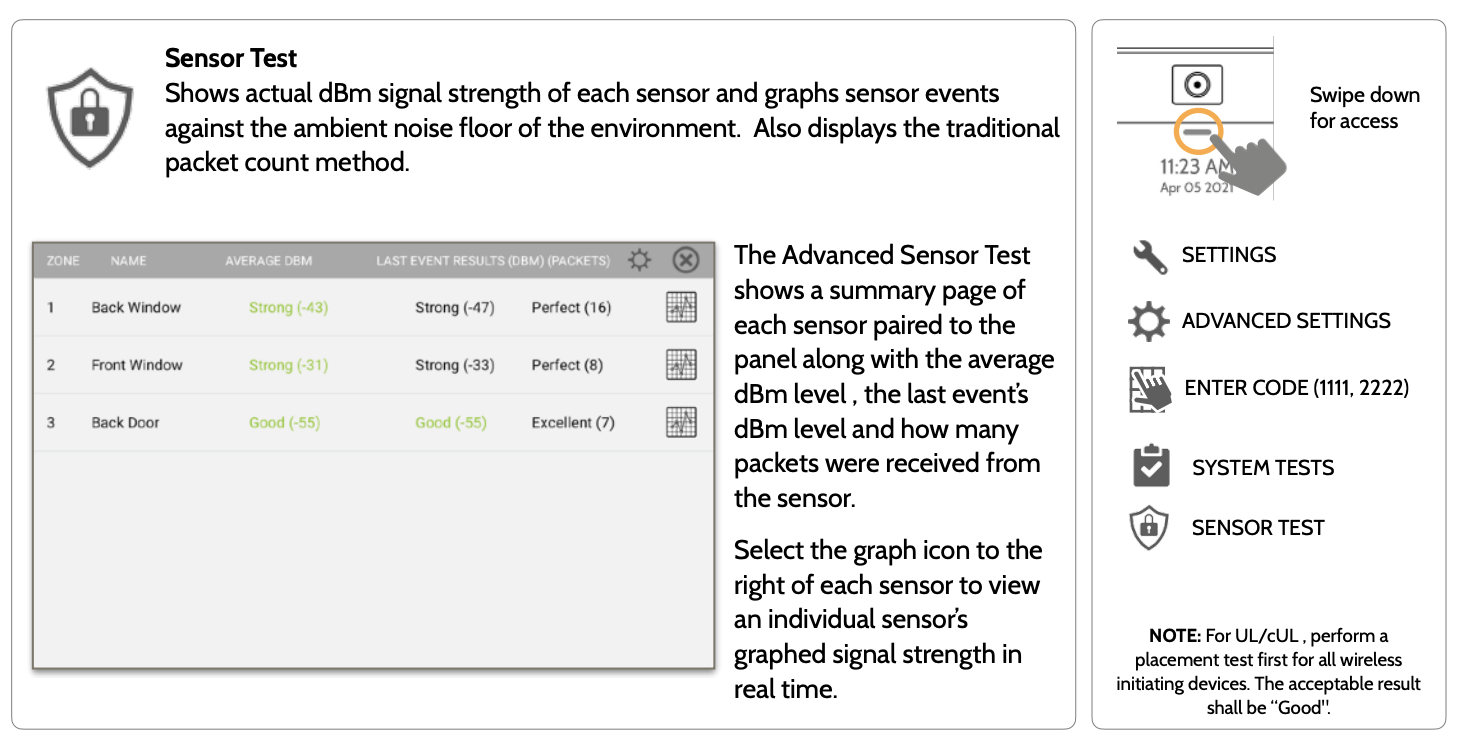
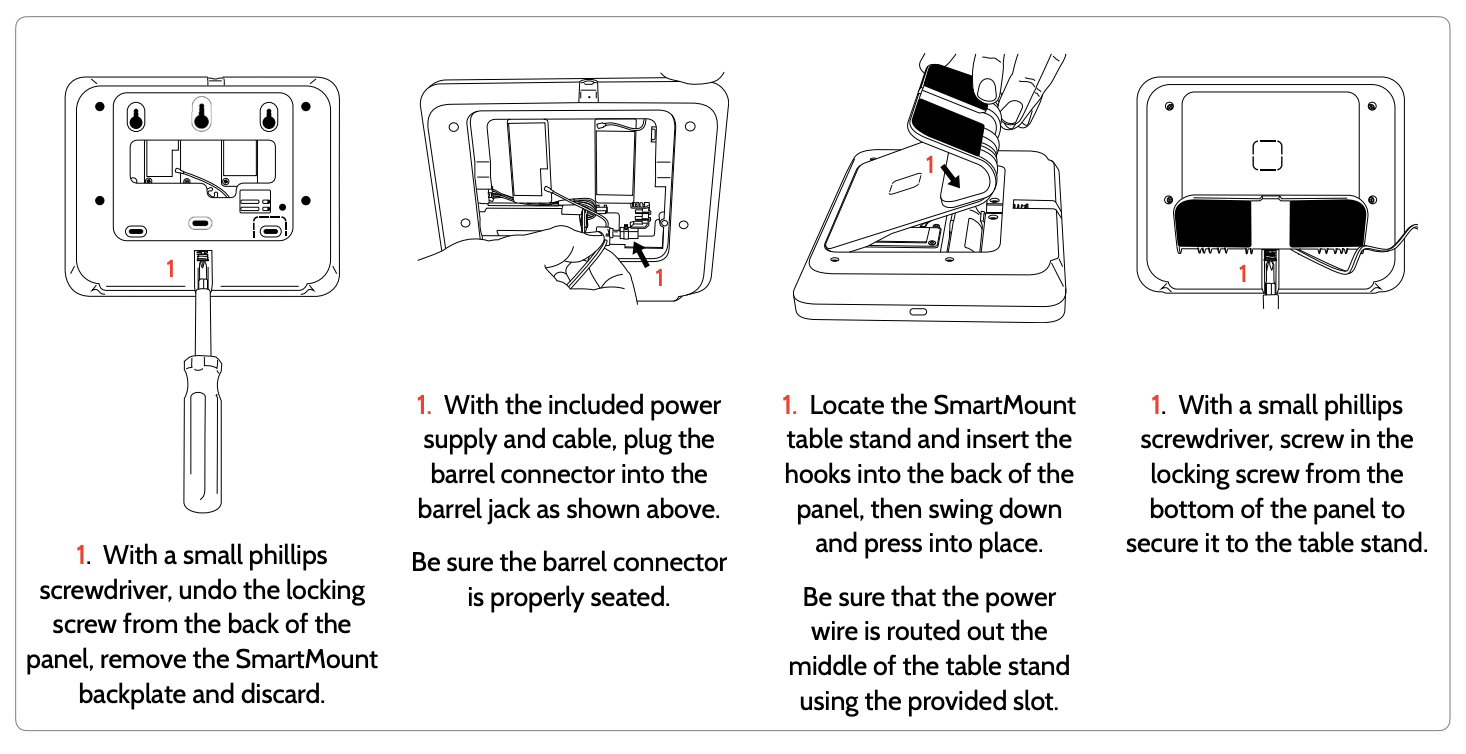
Table Top Back Stand
Most people use the back stand and sit their panel on a table or shelf because it’s easier and allows the panel to be relocated.
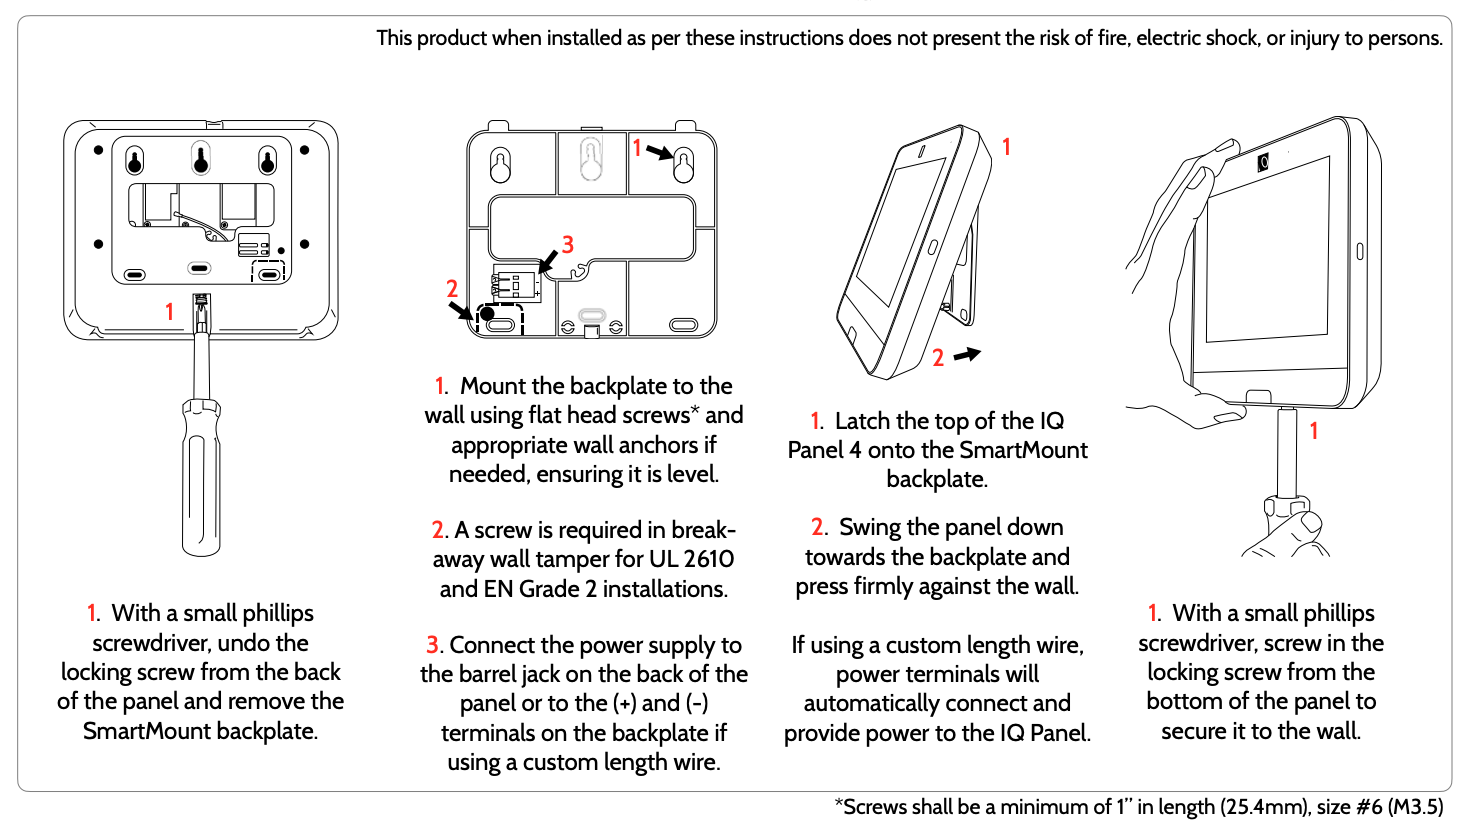
Wall Mounting
Wall mounting your panel is more difficult and makes it hard to relocate your panel later but may offer aesthetic or convenience benefits.
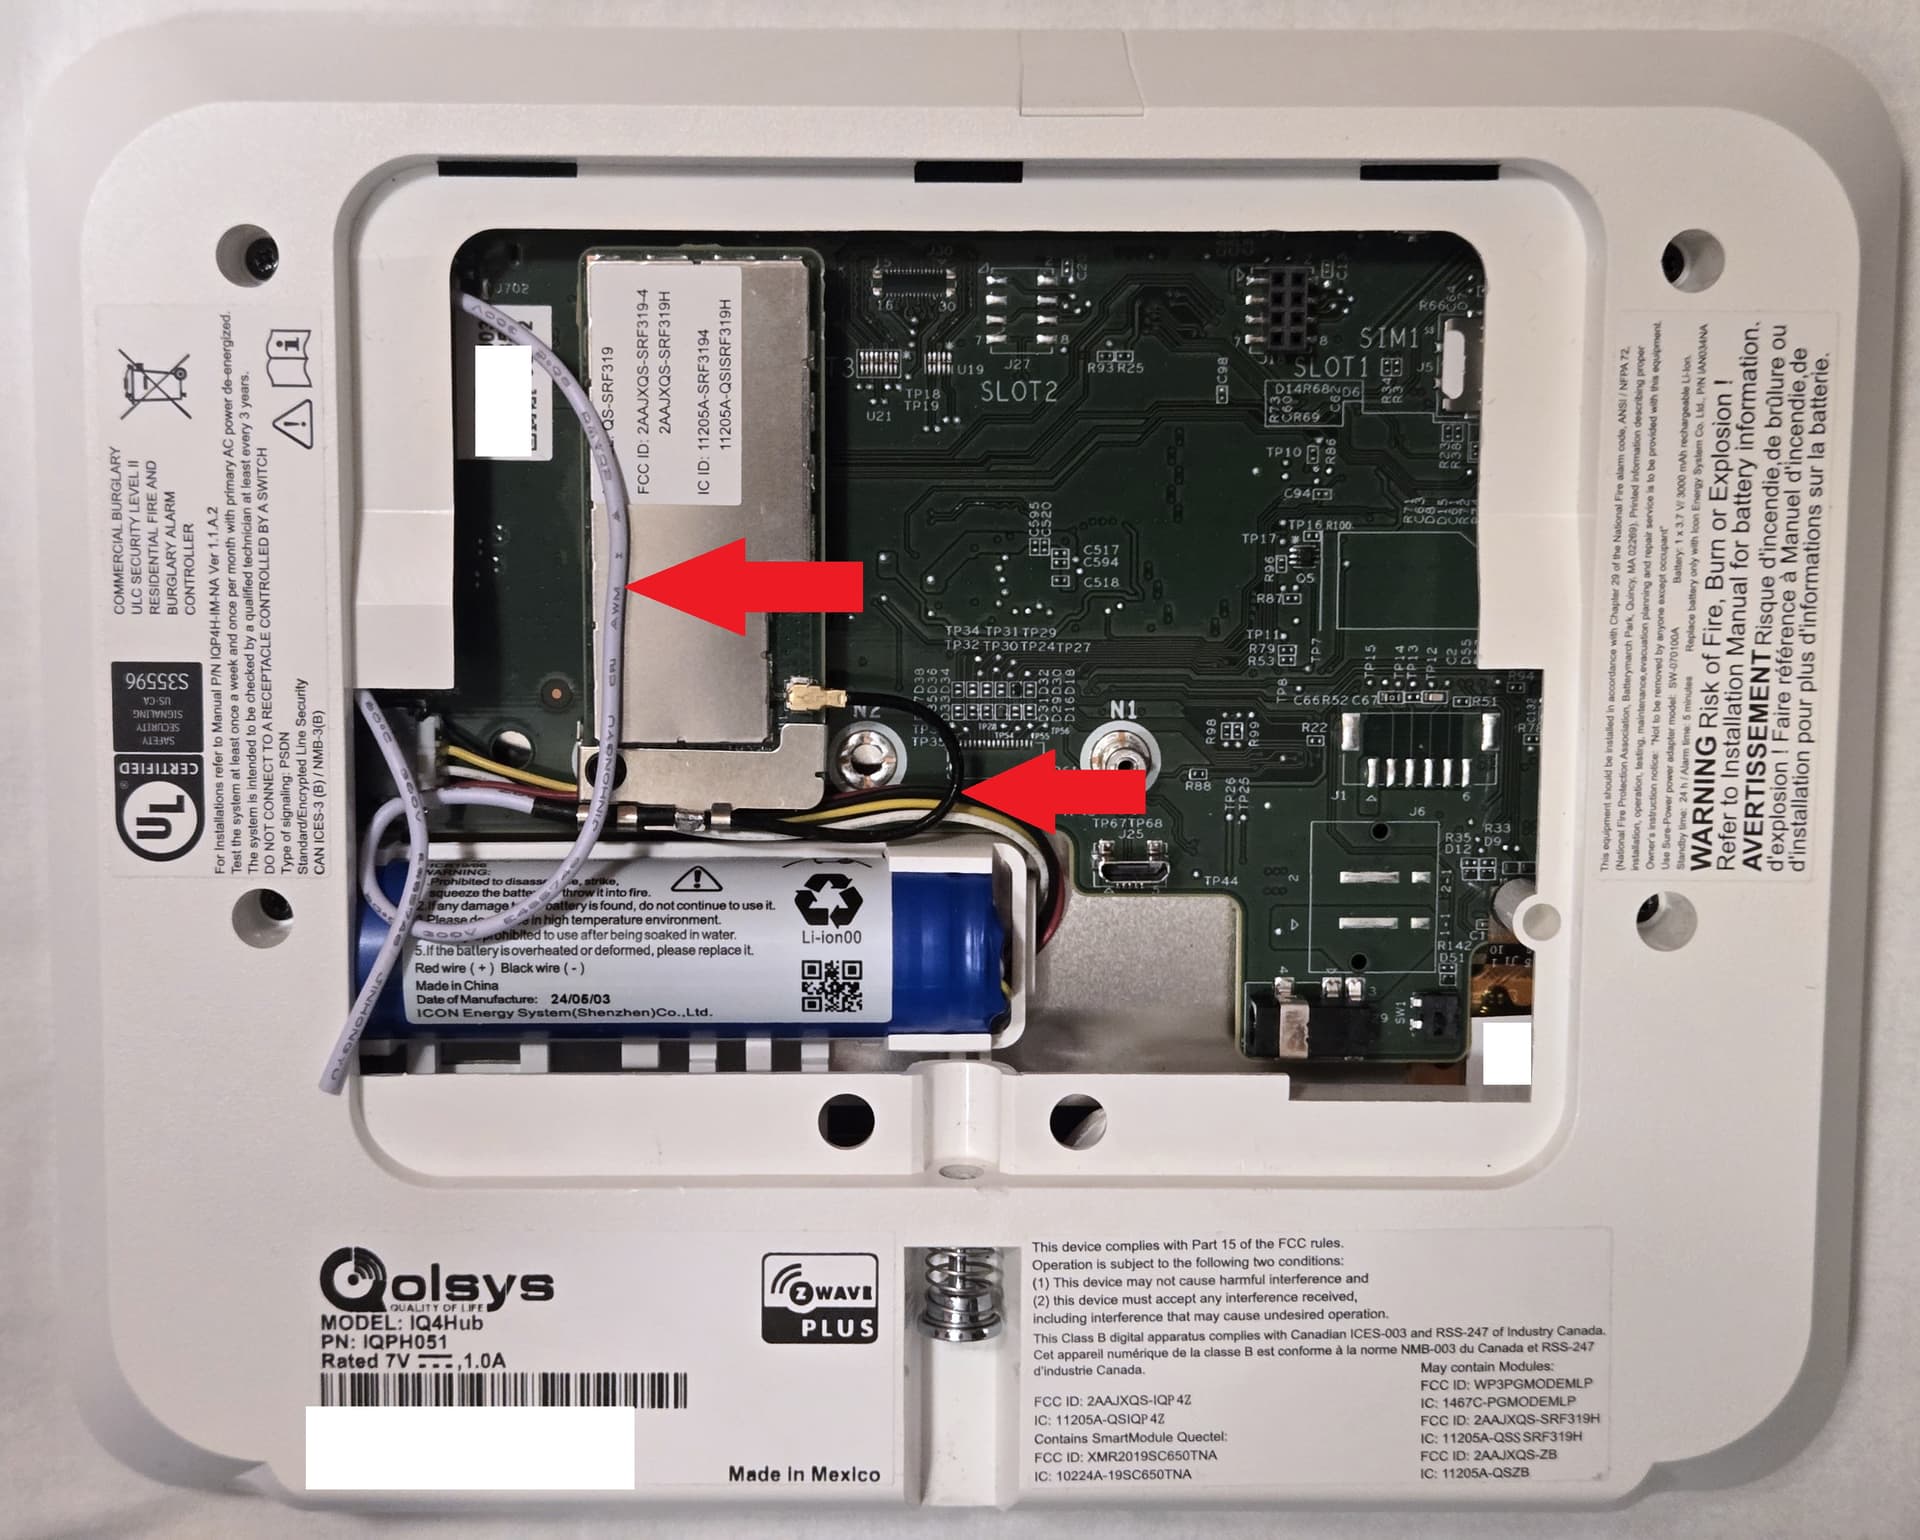
RF Antenna Placement
The IQ Panel 4 and IQ4 Hub use a thin white antenna for their legacy RF sensor daughtercards. This white antenna must be routed out the back of the panel (and into the wall if wall mounted) to make sure your panel can receive those sensor signals effectively.
If you leave the antenna inside the panel you may experience reduced signal strength for sensors. This does not affect PowerG sensors or daughtercards, only 319.5, 345, and 433 Mhz daughtercards.

SRF Antenna routed out the back of the panel
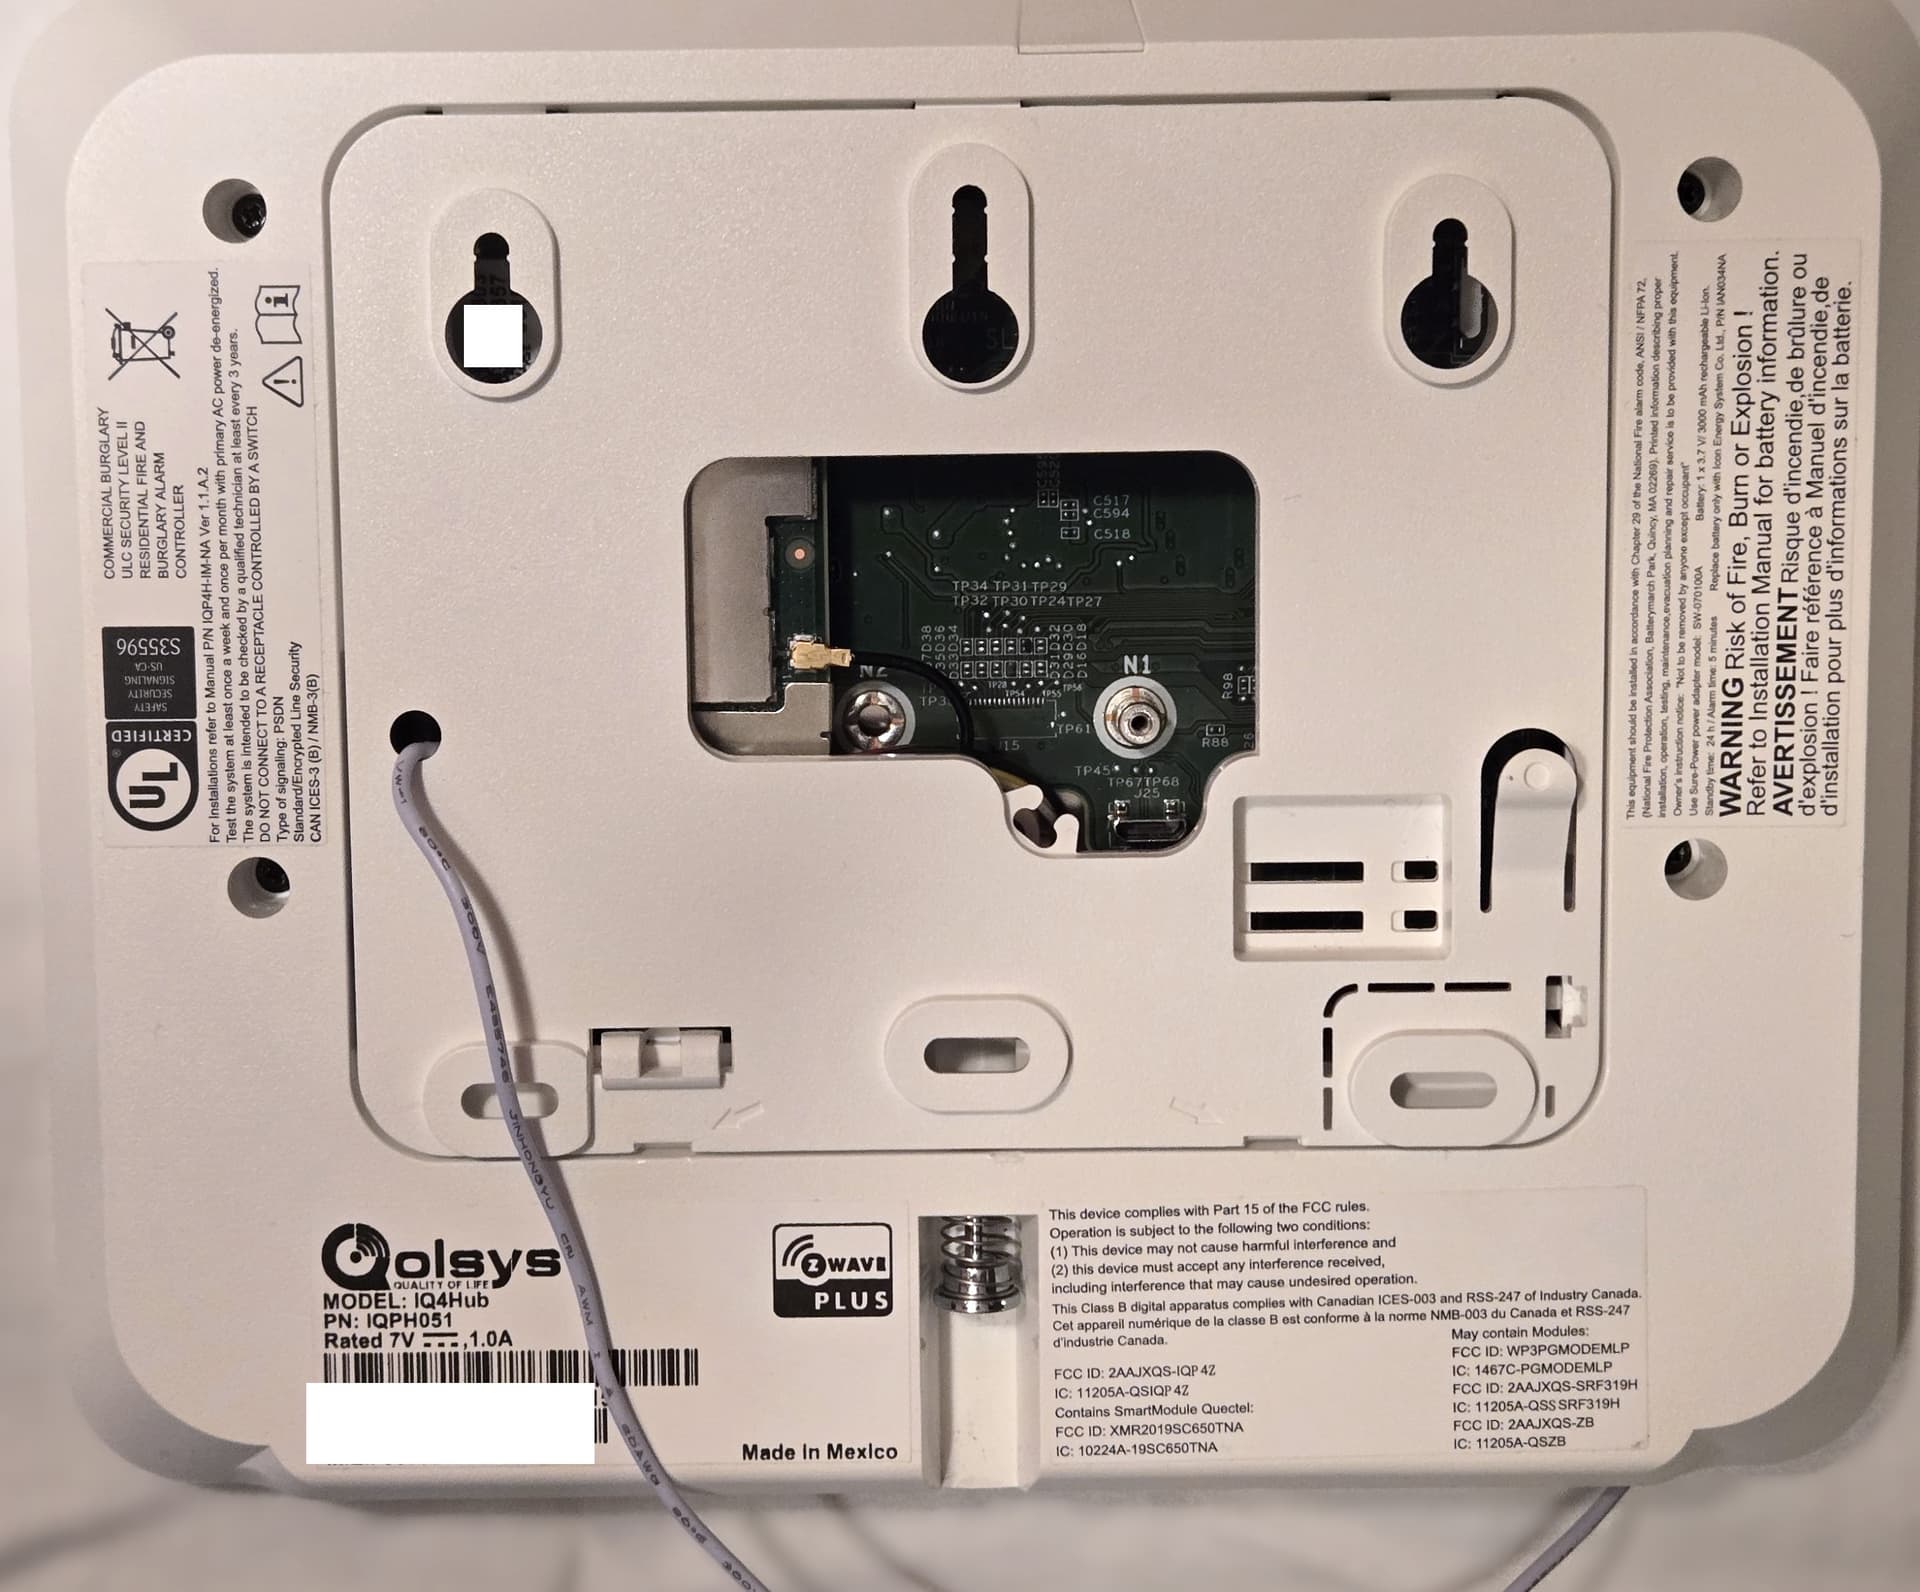
Antenna should be routed out the back of the panel for SRF signalling
Note: IQ 4 Hub shown
SRF Antenna Connected to Radio but still inside panel
Antenna is usually inside panel during shipment, must be routed outside the panel
Note: IQ 4 Hub Shown
SRF Antenna Disconnected from Radio
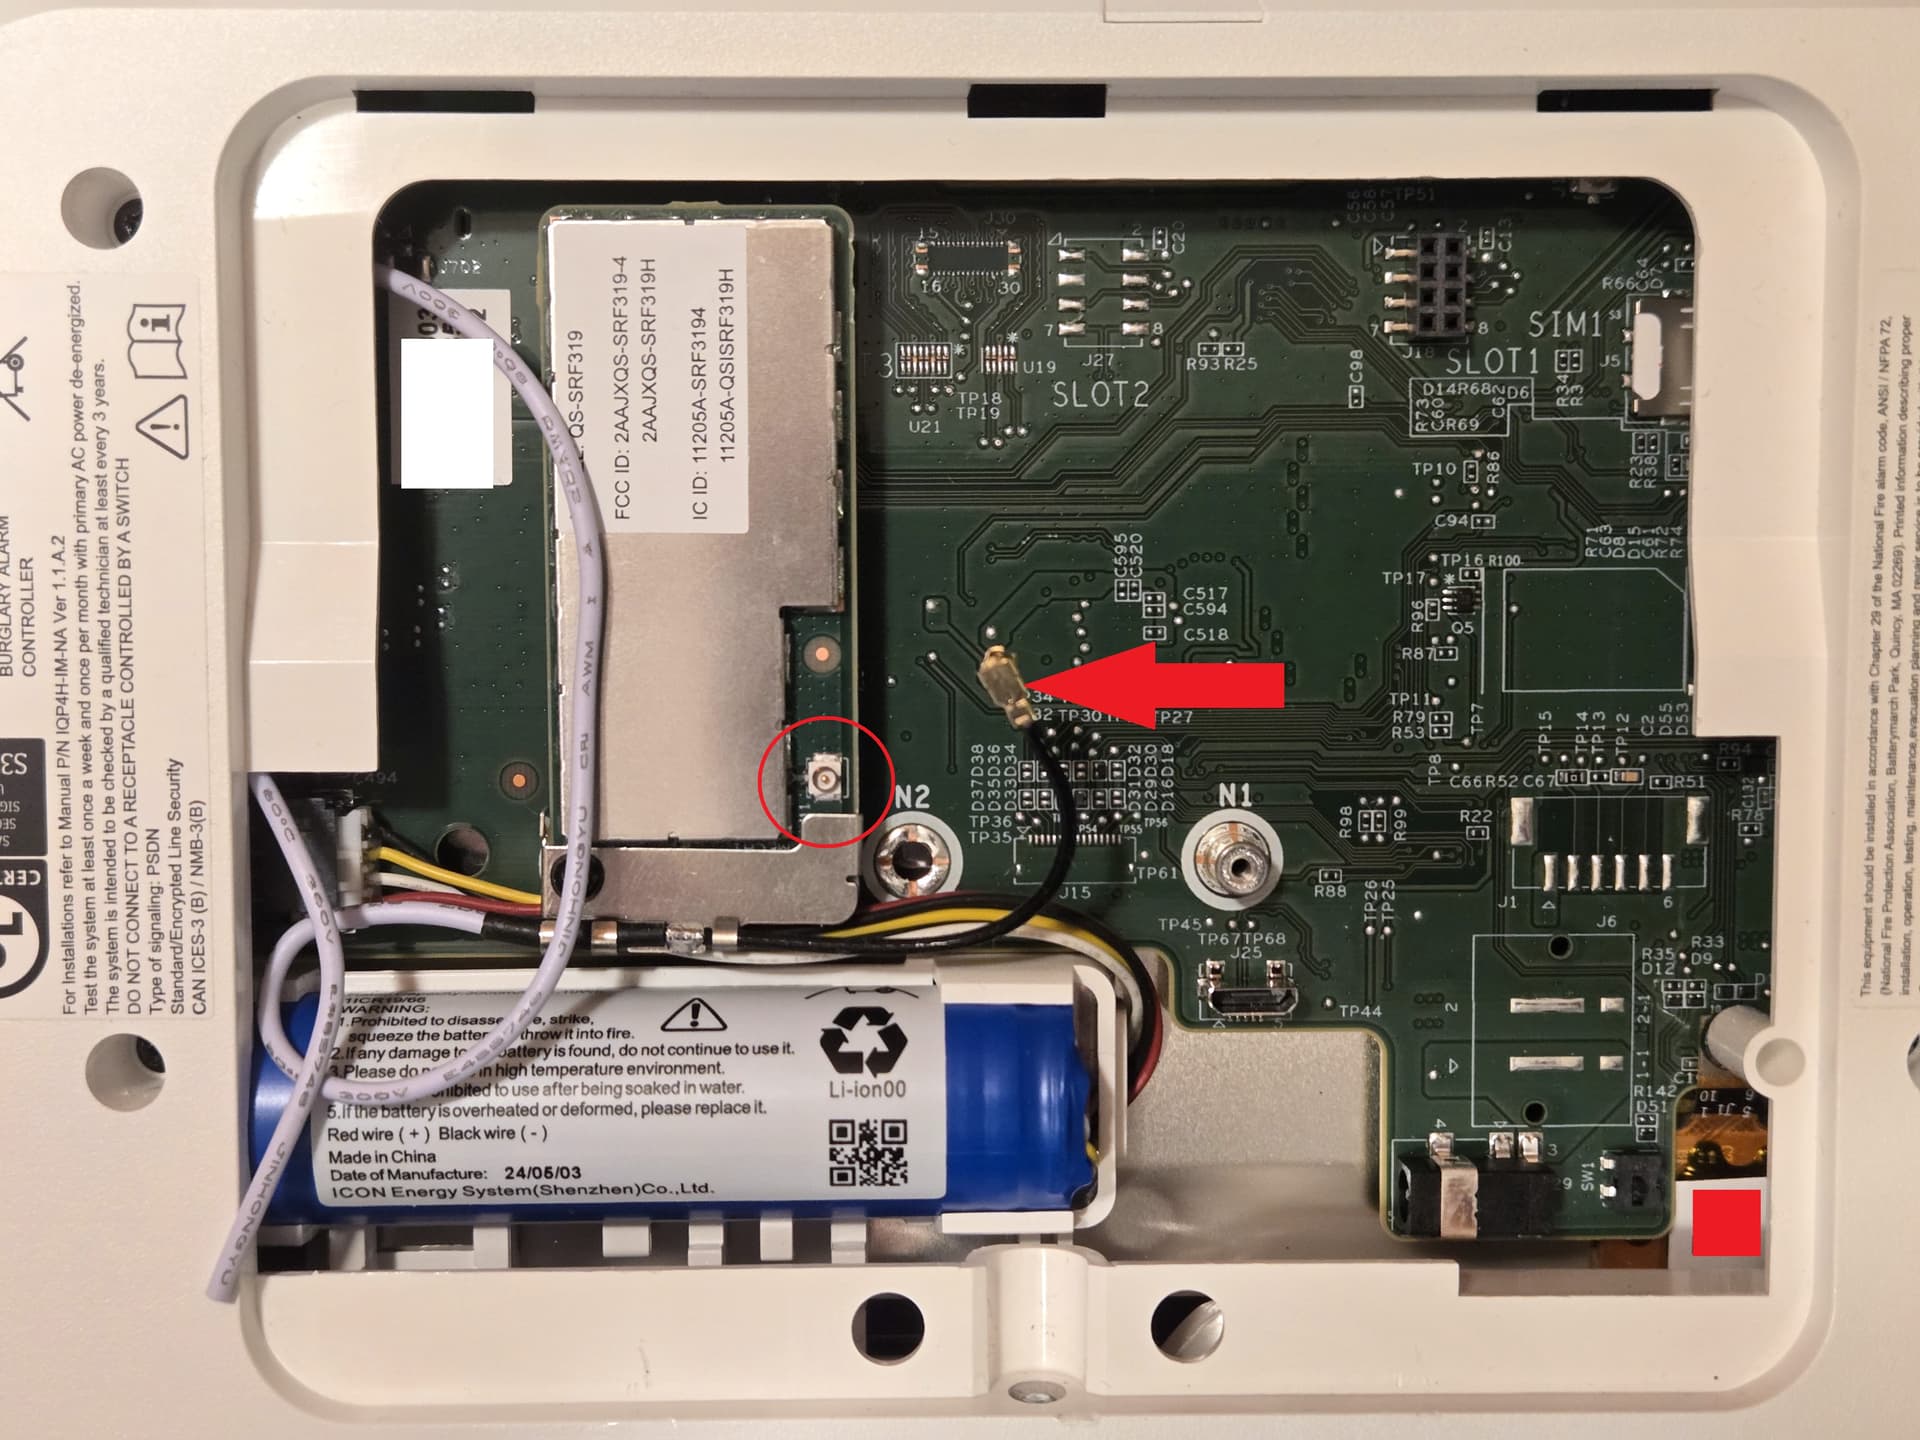
Antenna is disconnected from the SRF radio. Must be connected.
Note: IQ 4 Hub shown
Physically Install Sensors
Now that you know the sensors can communicate with the control panel in their desired locations, go ahead and physically install them by following their included instructions.
6. Go Back To System Manager
Almost done! Just a few more steps to finish setting up your new system.
Reset Installer & Dealer Codes
You’ve already created a user code for each user who can disarm the control panel. There are two special codes you need to change from their defaults in order to properly secure you panel. Go to System Manager to change the installer and dealer codes.
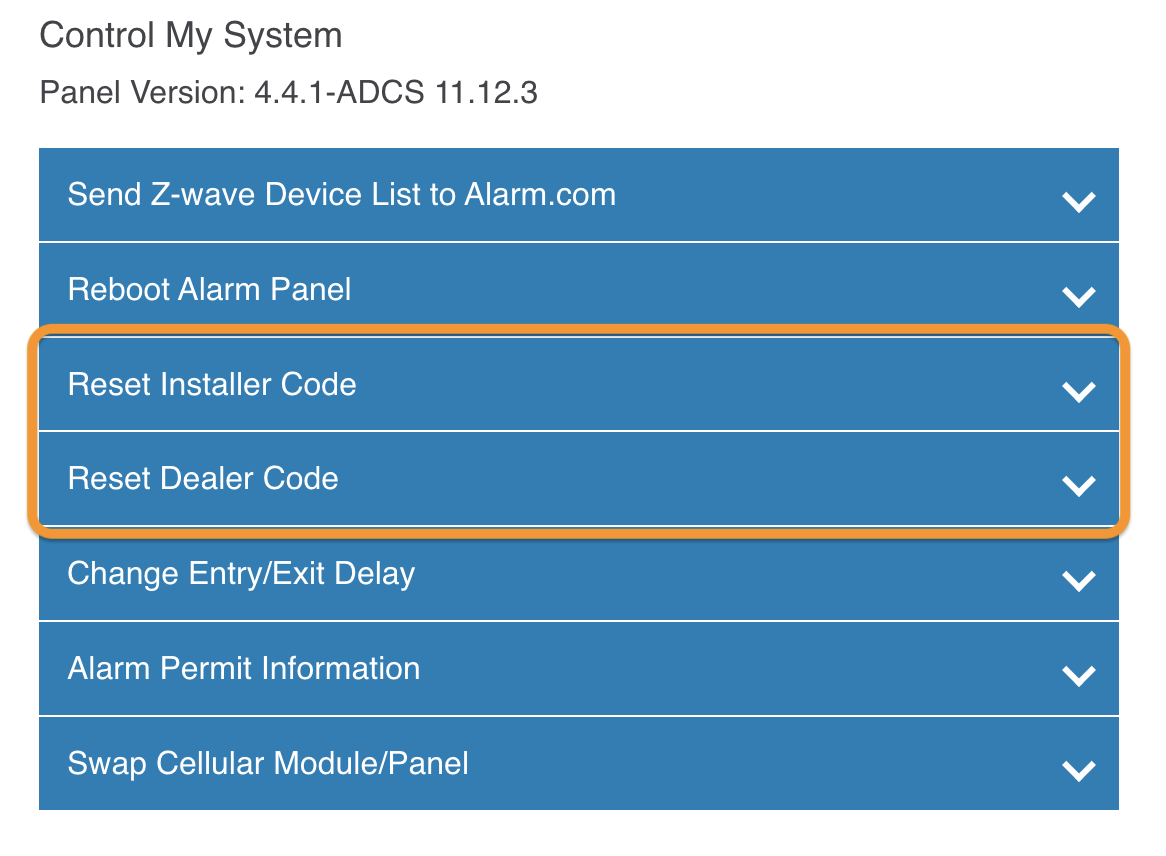
The Installer Code is a special code that gives you access to do installer tasks on on your system such as adding/removing sensors. The default installer code is 1111.
The Dealer Code is an even more powerful code that gives you access to do everything the installer code can do, as well as master reset the entire panel. The default dealer code is 2222.
You need to change both of these codes to something you can remember and other people can’t guess.
Enable Professional Monitoring
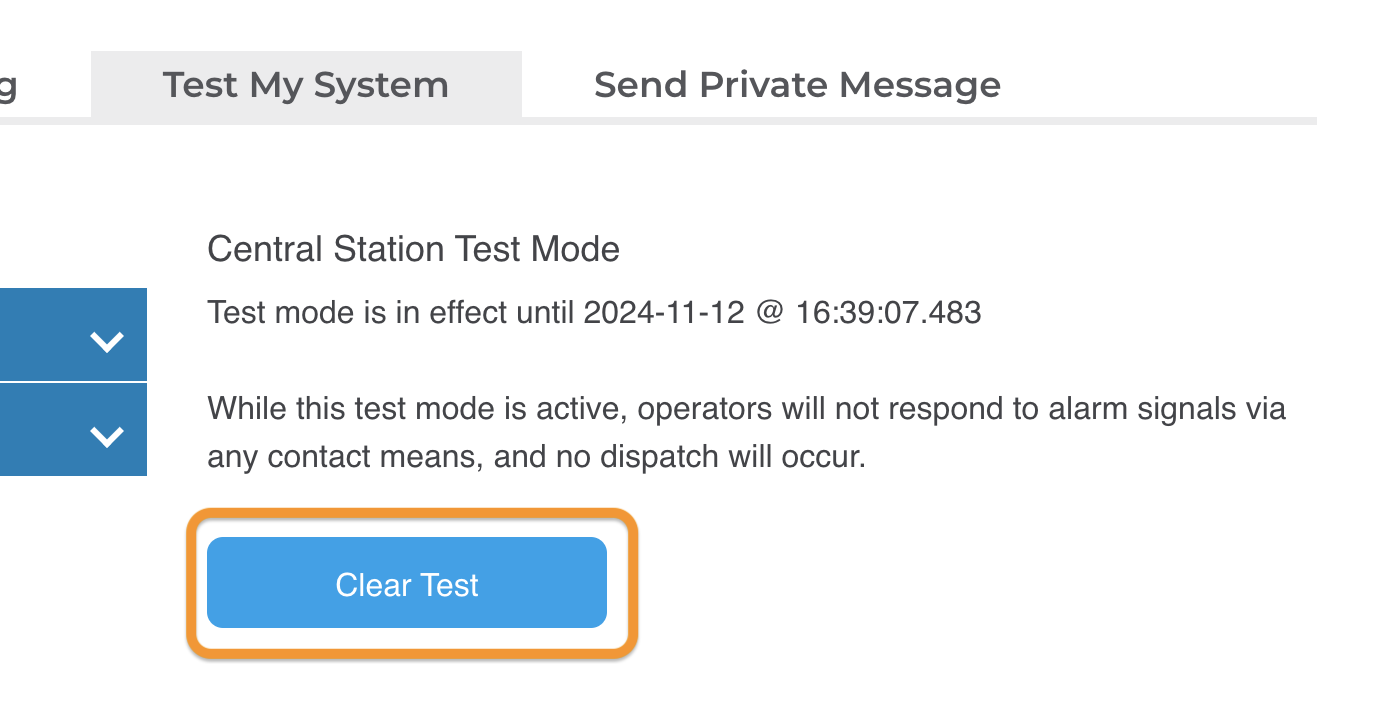
If you have professional monitoring, it was put on test mode when you activated your Alarm.com account to avoid false alarms while you installed your system.
Carefully read this guide on how to use professional monitoring.
Now that everything is installed and tested, and you know how to use professional monitoring, go ahead and disable test mode.
Go to the Test My System tab in System Manager, and Clear Test mode.
Full System Testing
Now you can do full system testing with everything connected and professional monitoring enabled. This is a good idea after you finish installing your new system and ongoing, about once per year.
7. Make the Most of Alarm.com!
Now that you have Alarm.com, let’s make sure you’re using it! Set up some smart features in your new system.
Enable Push Notifications
In the Alarm.com app, go to More > Notifications and hit the slider to enable push notifications.
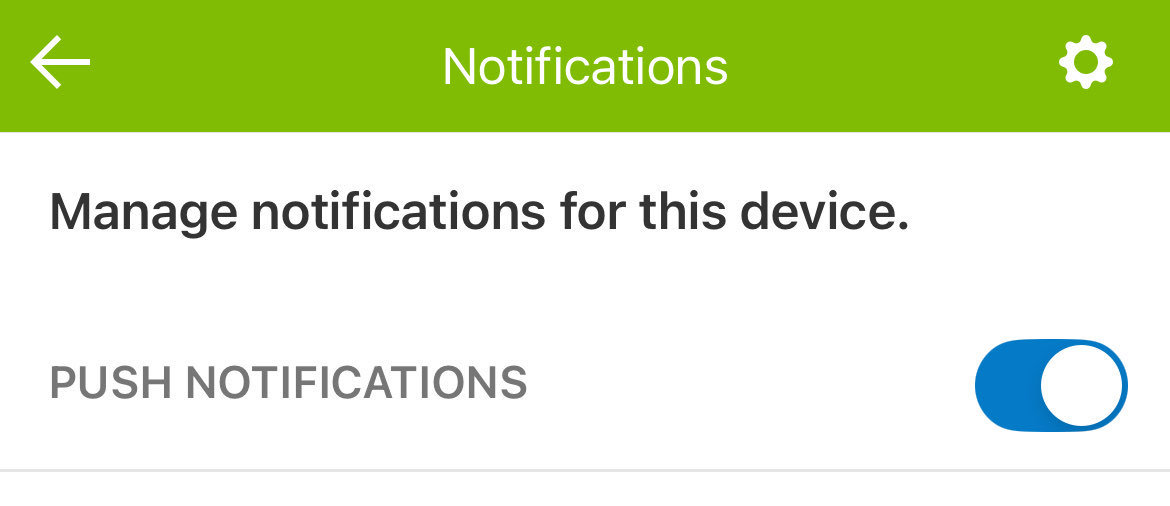
Push notifications are the best way to get notified when important events occur in your home. Use push notifications instead of text messages.
Enable Location Services
In the Alarm.com app, go to More > Places and hit GET STARTED to enable location services and set your home location.
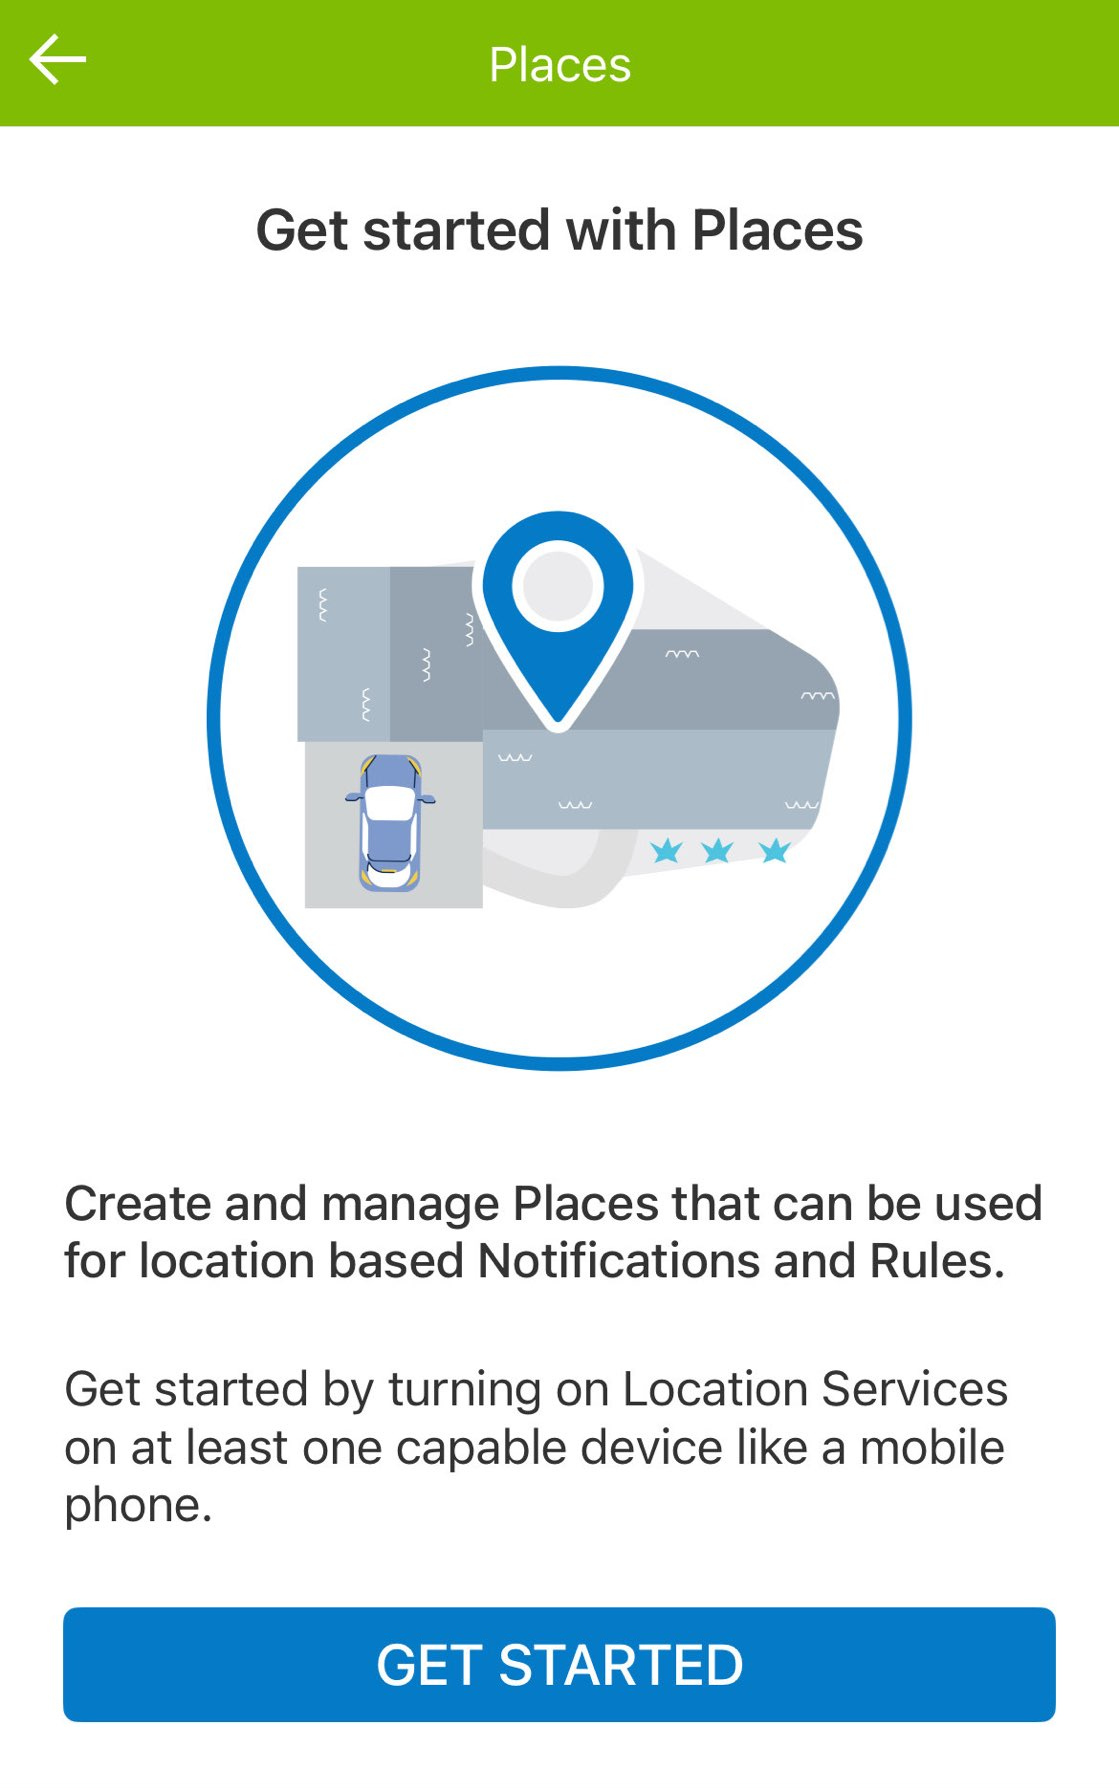
With location services enabled, your system is smarter and can do more!
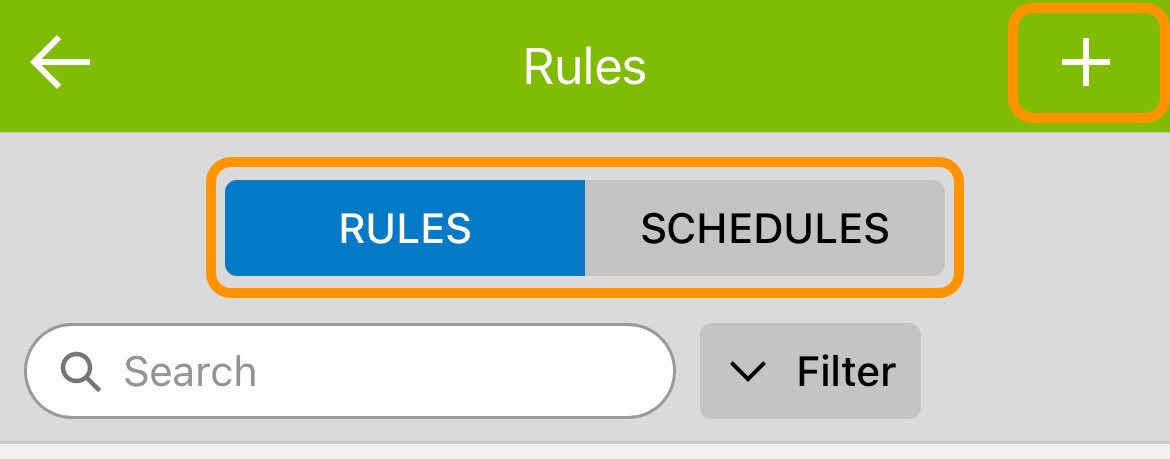
Automate Your System
In the Alarm.com app, go More > Automation and use the ![]() button to create automation rules and schedules.
button to create automation rules and schedules.
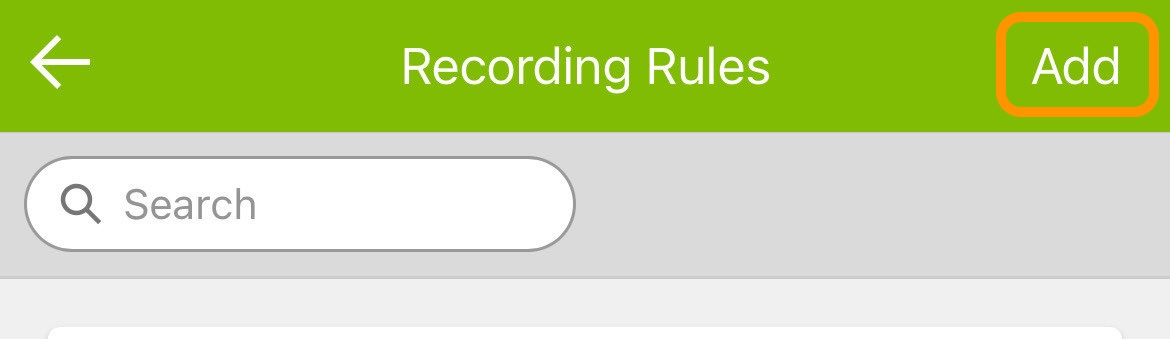
If you have cameras, go to Video > ![]() (gear button) > Recording Rules to create recording rules that determine when your cameras will notify you and upload video to the cloud.
(gear button) > Recording Rules to create recording rules that determine when your cameras will notify you and upload video to the cloud.
The more cameras and smart home devices you have connected to your system, the more automations you can create!
Automations and video recording rules can also be managed using the Alarm.com website.
Set Arming Reminder Time
In the Alarm.com app, go to More > Notifications > Manage for All Recipients > Arming Reminder to set an arming reminder time that works for your schedule.
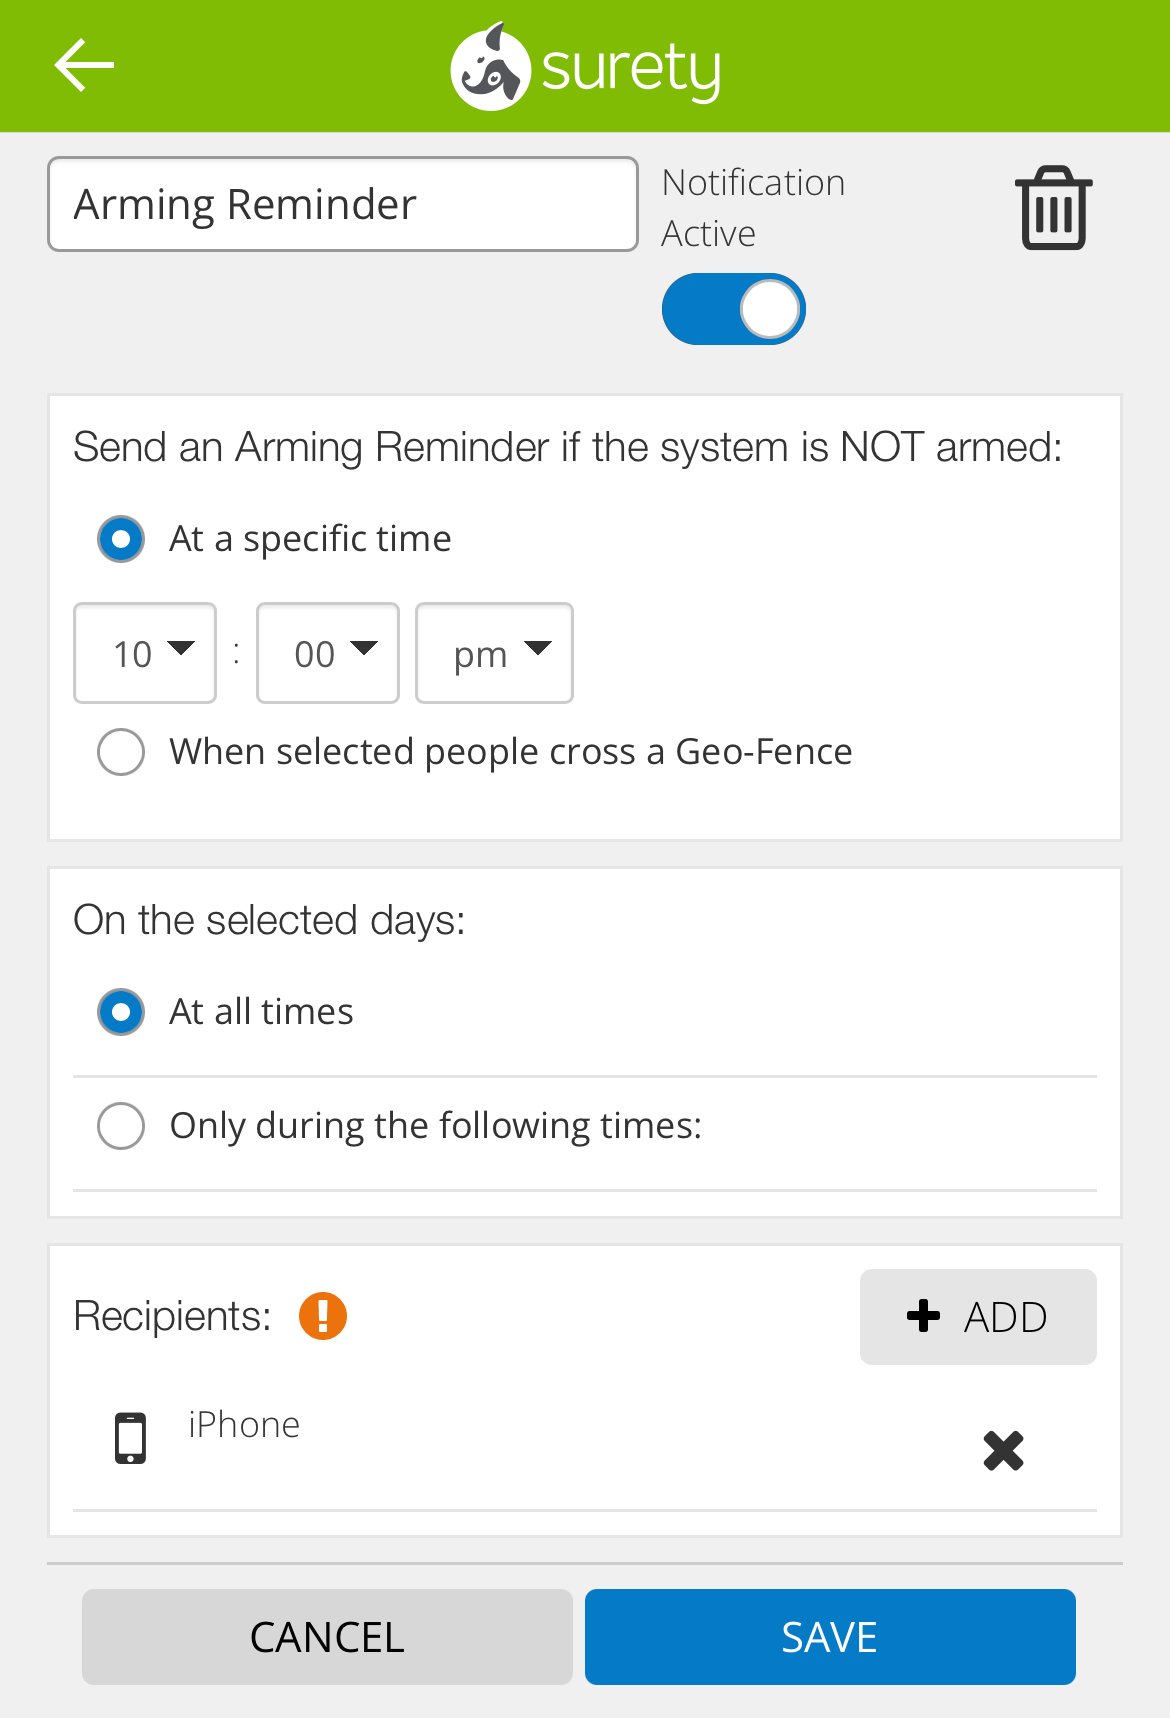
You can even set the arming reminder for when you cross a Geo-Fence so that you remember to arm whenever you leave home!
Arming reminders can also be managed using the Alarm.com website.
That’s it! Your new Surety system is set up and ready to use. If you run into any trouble or have any questions, it’s easy to get support. We’re here to help.
Enjoy your new Surety system.