Notifications can be created to notify users of a variety of different system activities. They can be created in the Alarm.com website or mobile app.
The types of notifications that can be create are dependent on the service package your are signed up for and the equipment type that is programmed into the system. Some examples of notifications that can be created are:
- Alarm Event
- Arming Event
- Arming Reminder
- Sensor Activity
- System Event
- Video Callout
To create/edit a notification using the Customer Website:
- Log into the Customer Website.
- Click Notifications.
- Click Edit Pencil on the notification to edit.
- If the notification is not created yet, click + New Notification and then click to select the type of notification to create (e.g., Alarm, Arming Event, Arming Reminder, Sensor Activity, System Event, Video Callout, etc.).
- Enter the desired name for the notification.
- Configure the notification as desired.
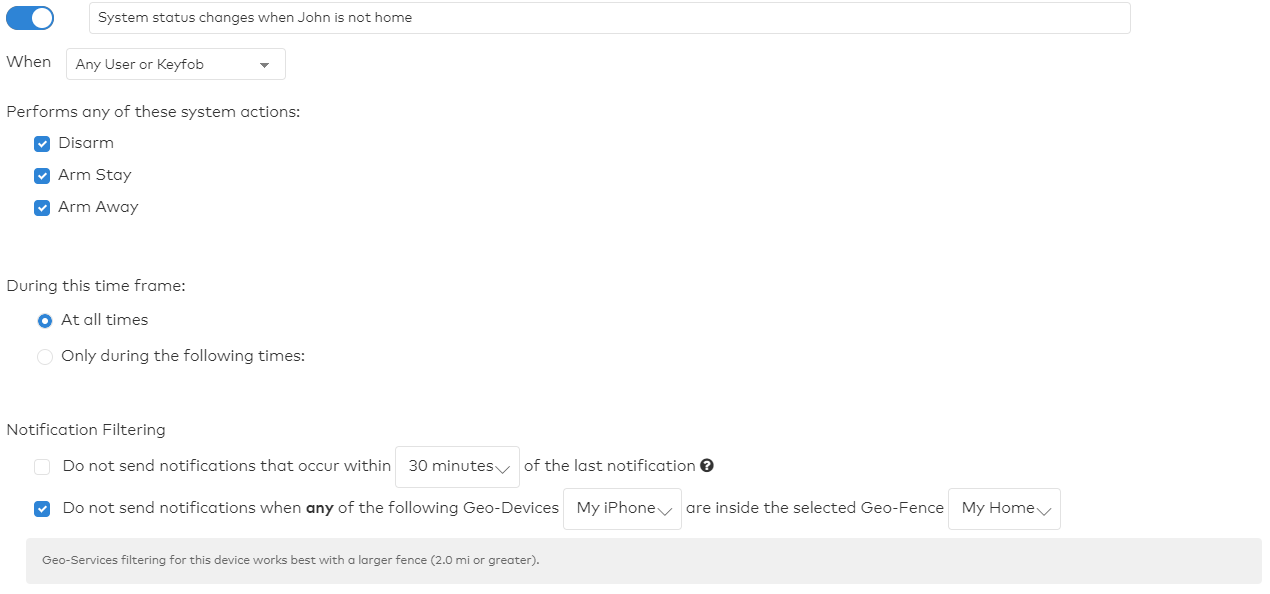
- Some notifications allow for notification filtering.
- In Recipients, click + Add Recipient to select which contacts receive the notification.
- Click to select the entries in the Address Book to be notified.
- If a contact is not listed:
- Click + New to add a new Address Book entry.
- Enter the new contact’s information, then click Add Contact.
- To remove recipients, click the X Icon to remove the desired notification recipient.
- Click Close.
- Verify the notification is configured with the desired settings.
- Click Save.
To create/edit a notification using the Customer app:
- Log into the Mobile app.
- Tap Menu Icon
- Tap Notifications.
- Tap to select the notification to edit.
- If the notification is not created yet, tap + Plus Sign and then tap to select the type of notification to create (e.g., Alarm, Arming Event, Arming Reminder, Sensor Activity, System Event, Video Callout, etc.).
- Enter the desired name for the notification.
- Configure the notification as desired.
- Some notifications allow for notification filtering.
- In Recipients, tap + Add Recipient to select which contacts receive the notification.
- Tap to select the entries in the Address Book to be notified, then tap Close.
- If a contact is not listed:
- Tap + Add Contact to add a new Address Book entry.
- Enter the new contact’s information, then tap Add Contact.
- To remove recipients, tap X Icon to remove the desired notification recipient.
- Verify the notification is configured with the desired settings.
- Tap Save.
Notifications can be deleted from the Notifications page by clicking the Trashcan Icon on the notification to be deleted. Some notifications are created by default and cannot be deleted. If the remove icon is not present on a notification, click the toggle switch to turn the notification off.