Create a Rule with Video Analytics
Video Analytics rules can be configured using the Alarm.com website or mobile app.
Note : It is possible to create up to three Video Analytics rules on the same camera. Additionally, ground zones and tripwires can overlap.
Using the Customer Website:
- Log into the Customer Website.
- Click Video .
- Click Recording Rules .
- Click Add Rule .
- In the New Video Recording Rule window, select Video Analytics .
Using the Customer app:
- Log into the Customer app.
- Tap Video .
- Tap Settings.
- Tap Recording Rules .
- Tap + Add New Rule .
- Tap Video Analytics .
Select the rule type
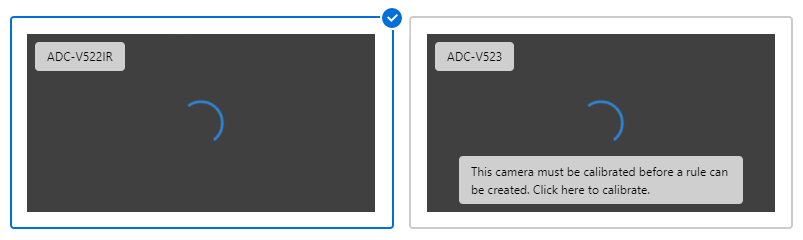
- Click to select the desired camera. If the camera needs to be calibrated, you will be directed to the Calibrate page (see above)
-
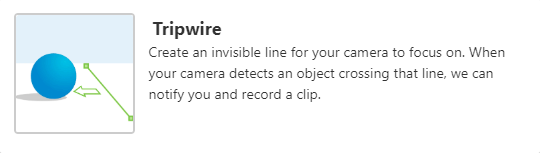
In Select Type , click to select the rule type.
- Click Tripwire when a target is likely to cross through the camera’s field of view or when objects enter or exit an area (e.g., a car pulling into or backing out of a driveway).
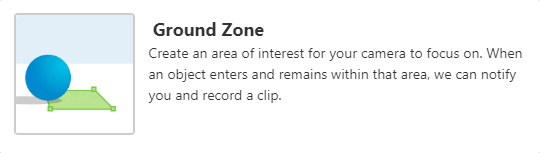
- Click Ground Zone when a target is likely to linger in the camera’s field of view (e.g., a person delivering a package on the front porch).
- Click Tripwire when a target is likely to cross through the camera’s field of view or when objects enter or exit an area (e.g., a car pulling into or backing out of a driveway).
-
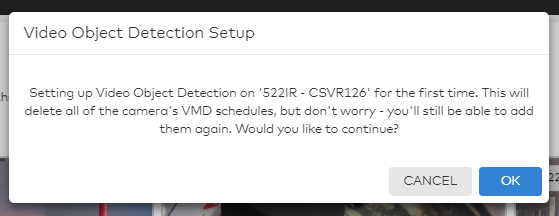
If the camera has Video Motion Detection (VMD) recording rules set up, they must be deleted before setting up a Video Analytics rule. When prompted with the following warning, click OK to continue.
-
Click Next.
Select the camera scene
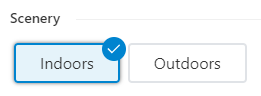
- In Scenery , click to select Indoors or Outdoors based on where the camera is installed. The camera should be marked outdoors if it will be exposed to rain, snow, spider webs, or moving trees and set to indoors if in a controlled outdoor environment (e.g., a screened-in porch).
- Note : This selection must be the same across all recording rules associated with a specific camera.
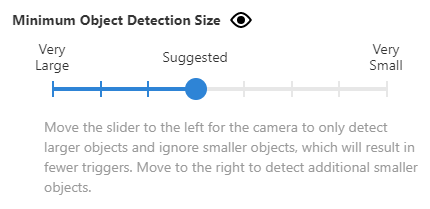
- Use the Minimum Object Detection Size slider to adjust how small an object can be and still trigger a recording. It is recommended to keep this at its suggested value upon initial rule creation. Very Large captures the fewest recordings only of the largest objects, and Very Small captures the most recordings including large and small objects.
- Note: Certain video devices have a calibration process that replaces the Minimum Object Detection Size setting. Minimum Object Detection Size will not appear on this page for those cameras. For more information about the calibration process, see above.
- Note: Certain video devices have a calibration process that replaces the Minimum Object Detection Size setting. Minimum Object Detection Size will not appear on this page for those cameras. For more information about the calibration process, see above.
- Click Next.
To Configure a Ground Zone rule:
Skip this section if Tripwire was chosen during rule type selection.
- In the Rule Name field, enter a name for the recording rule.
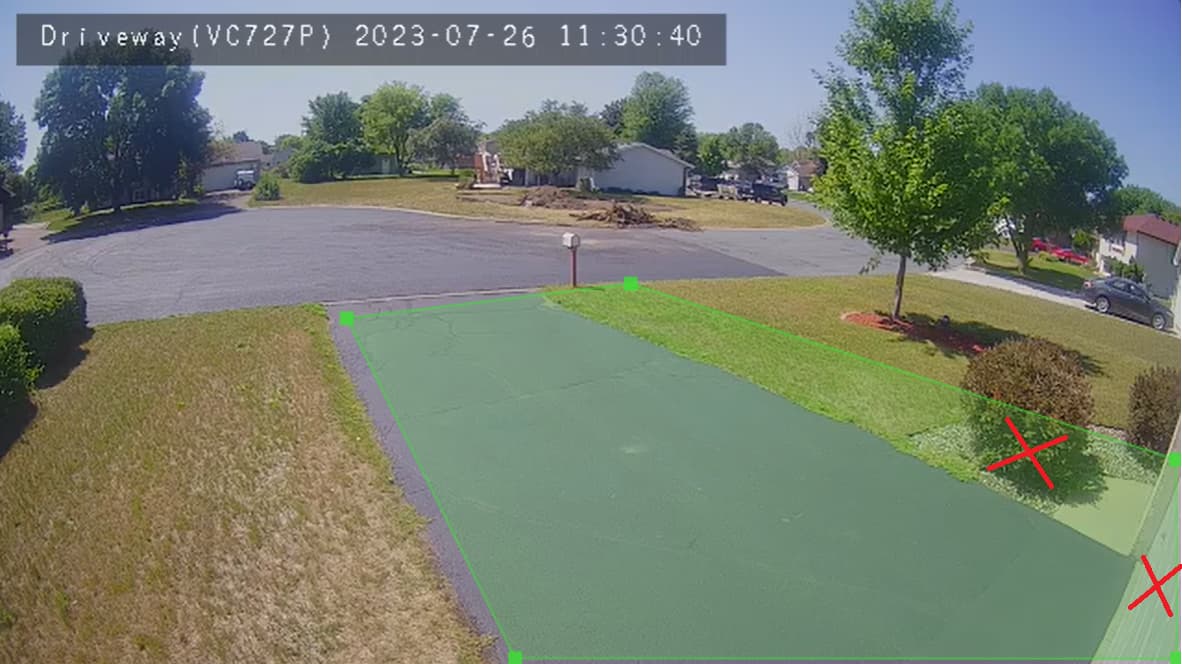
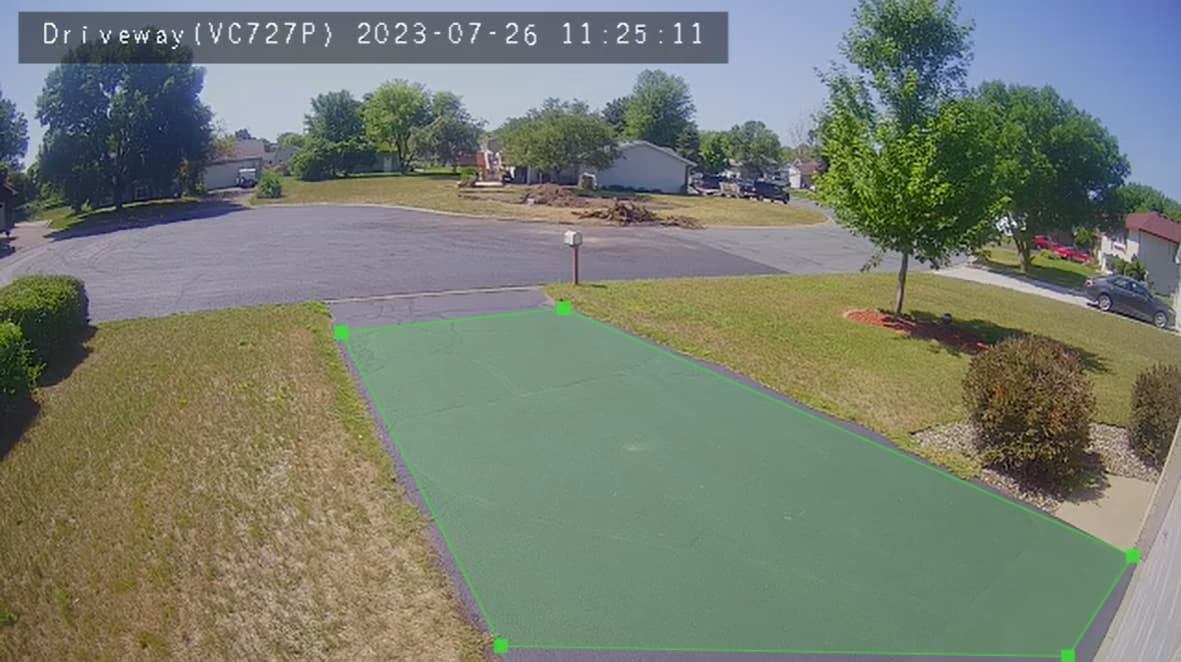
- Click and drag the corners of the shape to cover only the ground where the target’s feet will be. To clear the current area of interest and restart, click Clear ground zone .
-
Click and hold inside the shape to move it around without changing its shape.
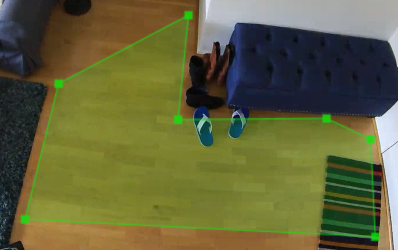
- Using the Duration Inside Area of Interest drop down menu, select the desired time an object needs to stay inside the Ground Zone to trigger a recording.
To Configure a Tripwire rule:
Skip this section if Ground Zone was chosen during rule type selection.
-
In the Rule Name field, enter a name for the recording rule.
-
Click and drag the Tripwire to cover only the ground where the target’s feet cross. The arrow determines which direction the object must be moving to trigger a recording. To clear the current Tripwire and restart, click Clear Tripwire.
-
Customize the direction of movement to be recorded:
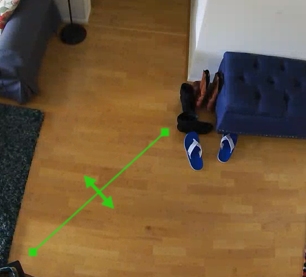
- In Direction , click Switch directions to switch the direction of the movement to capture.
- Click to select Both Directions to record when an object crosses the Tripwire regardless of which direction it is moving.
To configure schedules, exceptions, and notifications for the rule:
-
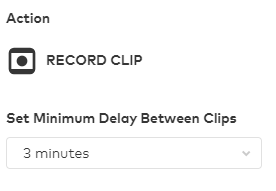
Using the Set Minimum Delay Between Clips drop down menu, select the desired time frame. This setting determines how long the camera must wait after recording a clip to trigger another recording.
-
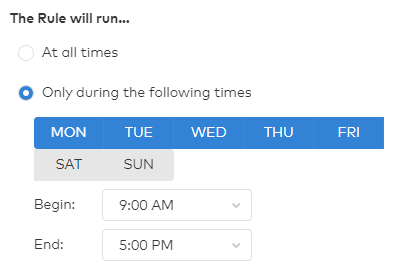
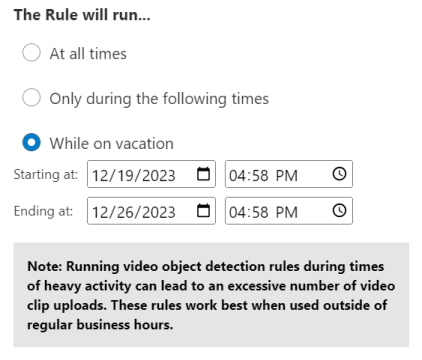
In The Rule will run… , click to select At all times or Only during the following times.
- If Only during the following times is selected:
- Click to select the days of the week to record on.
- Using the Begin dropdown menu, select the time for the recording rule to start.
- Using the End dropdown menu, select the time for the recording rule to stop.
- If While on vacation is selected:
- Select the Starting at date and time.
- Select the Ending at date and time
Note: Vacation Watch schedules have a maximum of 60 days.
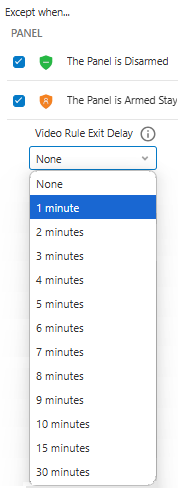
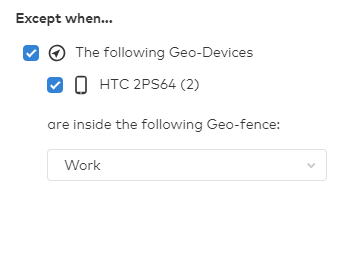
- In Except when…, click to select any available exceptions that turn the rule off regardless of the schedule. Options depending on the equipment include:
-
The panel is armed away or armed stay. When selecting either, use the Video Rule Exit Delay dropdown menu to select the desired delay before the camera resumes recording.
-
The Geo-Device is inside a specified Geo-Fence.
-
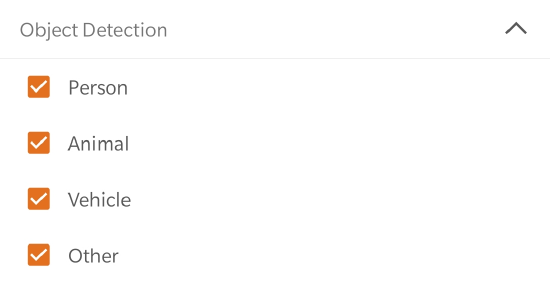
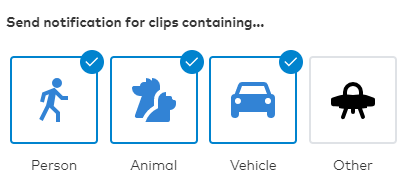
In Send notification for clips containing… , click to select the types of clips that the user wants to be notified about. The camera records and uploads all motion it detects but only sends a notification to the user based on the selected notification options.
Note : Clips included in the Other category are when the camera detects an object but is unable to determine which type of object it is. -
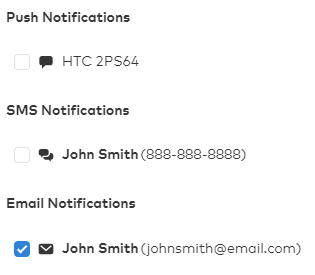
Click to select the desired notification recipients. It is recommended to use push notifications to a phone using the drop down option to attach a thumbnail.
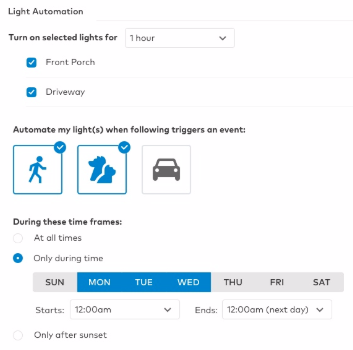
To configure light automation for the rule:
Camera-driven light automation rules require Lights to be enabled on your Alarm.com service package along with at least one Z-Wave light device enrolled on the account. If these requirements are met, the Light Automation section appears toward the bottom of the Video Analytics Rule.
Note : Lights cannot be enabled during a time when the Video Analytics rule is not set to record (e.g., if a tripwire rule is drawn on a driveway and set to record only at night, lights cannot be set to turn on during the daytime because no clip would have been recorded)
- Using the Turn on selected lights for dropdown menu, select how long the lights should turn on for.
- Click to select which lights are to be automated by the rule.
- In Automate my light(s) when following triggers an event , click to select which events should turn on the lights when triggered.
- In During these time frames , click to select At all times , Only during the following times , or Only after sunset .
- If Only during the following times is selected:
- Click to select which days of the week on which to record.
- Using the Begin drop down menu, select the time for the recording rule to start.
- Using the End drop down menu, select the time for the recording rule to stop.
Perimeter Guard
Perimeter Guard™ sounds an alert and flashes the camera’s status LED when unwanted visitors are detected. For more information on compatibility and use see below:
Package Alerts for the ADC-VDB770
Using Video Analytics, the ADC-VDB770 video doorbell can identify when a visitor leaves a parcel on their doorstep—notifying them immediately.
Package Alerts can be configured to notify a customer right when a delivery is made, remind them if the box is not picked up, or alert them if it goes missing.
For more information about Package Alerts see below: