The ADC-V731B camera’s USB-C connection point is designed to be waterproof when used with the Alarm.com Solar Panel Accessory for V731B Battery Camera (ADC-VACC-SP4W). When attached, the USB-C connector fits snugly against an internal gasket, blocking water from entering. This design has passed outdoor testing to ensure the camera remains safe and functional in any weather.
Tools needed
- Drill with 3/16" drill bit (optional for wood mount)
- Screwdriver with #2 Phillips bit
Install the wall mount
Note: It is recommended to mount the camera first, then find a location within 9 feet of the camera that gets 3 or more hours of direct sunlight a day to mount the solar panel. The rest of the instructions assume that the camera is already mounted.
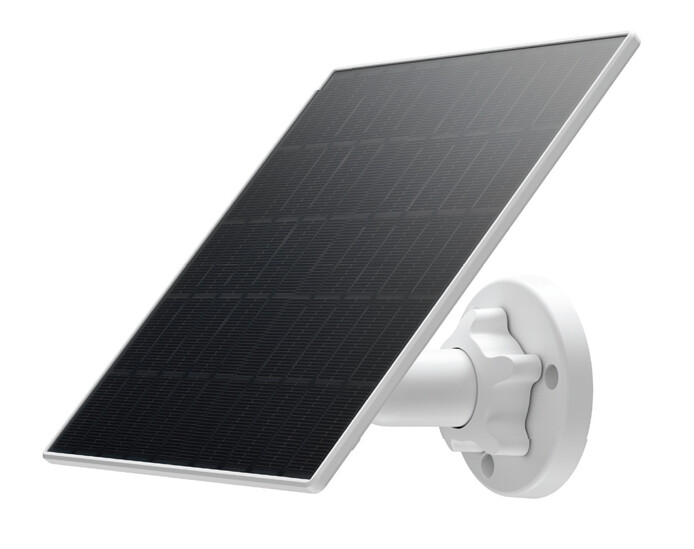
The SP4W features standard ¼" tripod screw threading, allowing compatibility with a variety of mounting options. A wall mount is included in the box for flush surface mounting. Alternatively, the solar panel can be used with a variety of third-party mounts and stands. Follow the instructions below to mount the solar panel to a flush surface.
- Choose the mounting location. The solar panel needs to be mounted within 9 feet of the camera.
- Verify there are no nearby obstructions that could cause shadows on the solar panel.
- Mark and drill mounting holes. Use the included mount to mark the desired locations for the mounting screws.
- If mounting to drywall, drill two 3/16" holes.
- Attach the mount. Align the solar panel’s mount with the drilled holes. Use the included screws to securely fasten the mount to the mounting surface.
- Attach the solar panel to the tripod screw.
- Screw the solar panel onto the tripod screw threading until it is tight and securely fastened.
- Adjust the solar panel angle. Loosen the collar on the mount to adjust the ball joint. Move the solar panel to align it according to your location below. Once the solar panel is positioned correctly, tighten the collar to secure it in place.
Align the solar panel
The solar panel needs to be in a sunny location that gets three or more hours of direct sunlight per day with no shadows.
For the Northern Hemisphere:
The solar panel needs to face south and be tilted to 45 degrees.
For the Southern Hemisphere:
The solar panel needs to face north and be tilted to 45 degrees.
A properly oriented solar panel can charge the camera’s battery up to twice as fast as a misaligned one. For more information, see this guide here:
Connect the solar panel to the camera
Stretch the cord from the solar panel to the camera. If there is any excess cable hanging, wrap it around the back side of the solar panel and use the clips to secure it. Once the cord is aligned properly and the extra is wrapped out of the way, locate the USB-C port on the back of the camera. Open the rubber dust cover and firmly insert the USB-C connector into the camera.
Verify the camera is charging
It is possible to verify the SP4W solar panel is charging the camera in the Activity log using the Alarm.com mobile app and website.
Review camera angle
While still logged in to the Customer app or Customer website, open the camera’s live view to verify its Field of View was not unintentionally altered while the solar panel was being installed, and also to check that the solar panel is not in the camera’s Field of View.
Regular maintenance
- Review the physical installation location periodically to make sure the solar panel is still aimed correctly.
- If the solar panel has collected dirt or debris, remove any debris and wipe with water and a clean, soft cloth.
- Review expected charging and maximize solar charging by making adjustments to the positioning as needed
Maximizing battery life
Important: The camera will only charge when its battery is within a safe temperature range of approximately 32°F to 113°F (0°C to 45°C).
- Position the solar panel optimally to maximize charging efficiency.
- The camera will not charge over 80% on solar power to extend the lifetime of the battery.
- The ADC-V731B goes into a low power mode until the PIR sensor detects motion. Once the trigger is activated, the camera comes online and processes the video. The more triggers, the faster the battery will be consumed. When using the solar charging solution, it is recommended that the triggers are tuned to eliminate as many false positives as possible.