Troubleshooting
The Flow LED is blinking
The Flow LED is used to indicate a system hardware failure or other operation that may impact the performance of the Smart Water Valve+Meter. The number of blinks and blink patterns can be used to diagnose the failure or operation.
- 2 blinks: High flow sensor failure
- 3 blinks: Low flow sensor failure
- 4 blinks: Actuator failure
- Steady blink: Low flow calibration in progress
Note: It can take up to 24 hours for low flow calibration to complete after installation.
The Smart Water Valve+Meter is sounding an alarm
The Smart Water Valve+Meter is equipped with a buzzer that can be configured to sound an alarm when a flow or temperature event is detected.
This alarm is designed to inform the homeowner of a flow or temperature event in the plumbing system. It is extremely important to inspect the plumbing for any leaks before considering the alert resolved.
To locally silence the buzzer during an active unexpected flow event:
Press and hold the Close button for 5 seconds.
Important: This action does not close the valve. To close the valve, quickly press the Close button once.
To silence the buzzer from the Customer Website or app during an active unexpected flow event:
- Log into the Customer Website or app.
- Click Fix It on the trouble condition alert.
- Click Pause the Buzzer.
The Smart Water Valve+Meter is not communicating with the Z-Wave controller
- Perform a network communication test by pressing the Network button. The Network LED will blink slowly while the Smart Water Valve+Meter attempts to communicate with the Z-Wave controller. If the test is successful, the device will sound one long tone and the Network LED will turn solid. If the test is unsuccessful, the device will sound three short tones and the Network LED will begin to blink intermittently until communication is restored.
- If step 1 is unsuccessful, verify that the Z-Wave controller is powered on and connected. If it is not, restore power and connectivity to the Z-Wave controller and repeat step 1.
- If step 2 does not resolve the issue, try removing the device from the network
- If step 3 does not resolve the issue, we recommend installing a Z-Wave repeater nearby and performing a Z-Wave network rediscovery.
Note : Any wall powered Z-Wave device will act as a repeater and improve the range between the Z-Wave controller and the Z-Wave device you are installing.
The actuator is moving, but no command (local or remote) was sent to close the valve
The actuator has two built-in features to extend the life of the actuator and ball valve. The actuator will perform a small movement periodically to ensure that the valve is fully open or fully closed, based on the state of the device.
Additionally, the actuator performs a 15-second valve check daily to ensure there are no restrictions in the motion of the ball valve. Both operations are expected behavior and will not restrict the flow of water.
To remove the Smart Water Valve+Meter from the Z-Wave network:
Note : For best results, it is recommended to bring the Z-Wave controller into the area where the Smart Water Valve+Meter is installed.
- Put the Z-Wave controller into remove mode.
- Press the Network button on the side of the Smart Water Valve+Meter control unit to begin the remove process. The Network LED on the control unit will begin flashing.
- The Network LED will turn off if the removal process is successful. If the Network LED is still illuminated after the removal process, repeat steps 1 and 2.
To reset the Smart Water Valve+Meter to factory default settings:
Caution: Resetting the Smart Water Valve+Meter to its factory default settings will remove the device from the network and restore all user settings to their default values.
- Press and hold the Network button for 10 seconds.
- All three LEDs will blink until the factory reset is complete. When the reset is complete, the LEDs turn off, and only the Valve Open or Valve Closed LED is illuminated.
Manual valve actuation
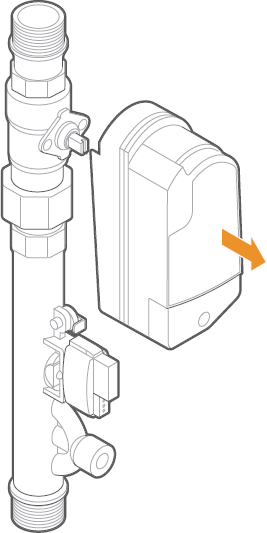
In the event of a power loss or system failure, the Smart Water Valve+Meter can be manually actuated using the following procedure:
-
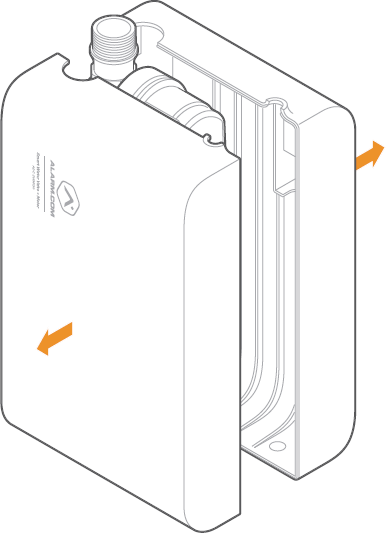
Remove the enclosure (if present).
-
Remove the actuator from the valve by pulling the actuator away from the valve+meter, keeping the actuator parallel to the valve+meter.
-
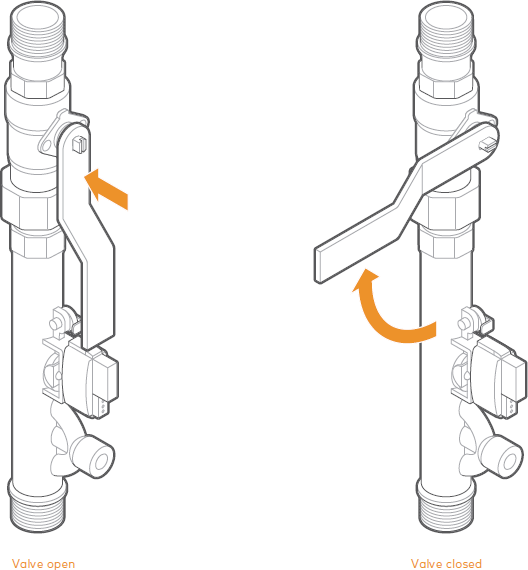
Use the valve wrench provided (attached to the inside of side B of the enclosure), a pair of pliers, adjustable crescent wrench, or flat head screwdriver to move the valve stem to the desired position, as shown below.
Unable to determine what is leaking
Common sources of water leaks
- Toilet
- Sink, shower, or tub faucets
- Outdoor spigots/hose bibs
- Water heater
- Washing machine
- Dishwasher
- Whole-home humidifiers
- Evaporative cooling systems
- Swimming pool
- Lawn irrigation systems
- Broken pipe seals
- Pipe corrosion
- Damaged pipe joints
Note: To ensure the rapid detection of leaks, water sensors may be used along with the Smart Water Valve+Meter’s flow detection features to create additional automatic shut-off rules