Installation
Important: If you have not installed the Alarm.com Smart Chime yet, do that now. For installation instructions, see Alarm.com Smart Chime (ADC-W115C) - Installation Guide
Power on the Wireless Video Doorbell
-
Remove the Wireless Video Doorbell (VDB780B) from the packaging.
-
Separate the battery pack from the VDB780B body.

-
Activate the battery by plugging in the Micro USB charger to a wall outlet and connecting it to the battery.

-
Check the top of the battery pack for a blue protective film. If present, please remove the film and discard it.
-
Press the doorbell button on the front of the battery. If the button LED alternates between red and blue, the battery pack must be recharged prior to completing the installation.
-
If the button LED isn’t alternating blue and red, reconnect the battery pack to the VDB780B body.
-
After the button LED stops flashing red, press and release the doorbell button and ensure the LED lights up red.
Connect the Wireless Video Doorbell to the Alarm.com Smart Chime
-
Verify the Wireless Video Doorbell (VDB780B) is less than 10 feet away from the Alarm.com Smart Chime (W115C).
-
Verify that the W115C has been installed and associated with an account.
-
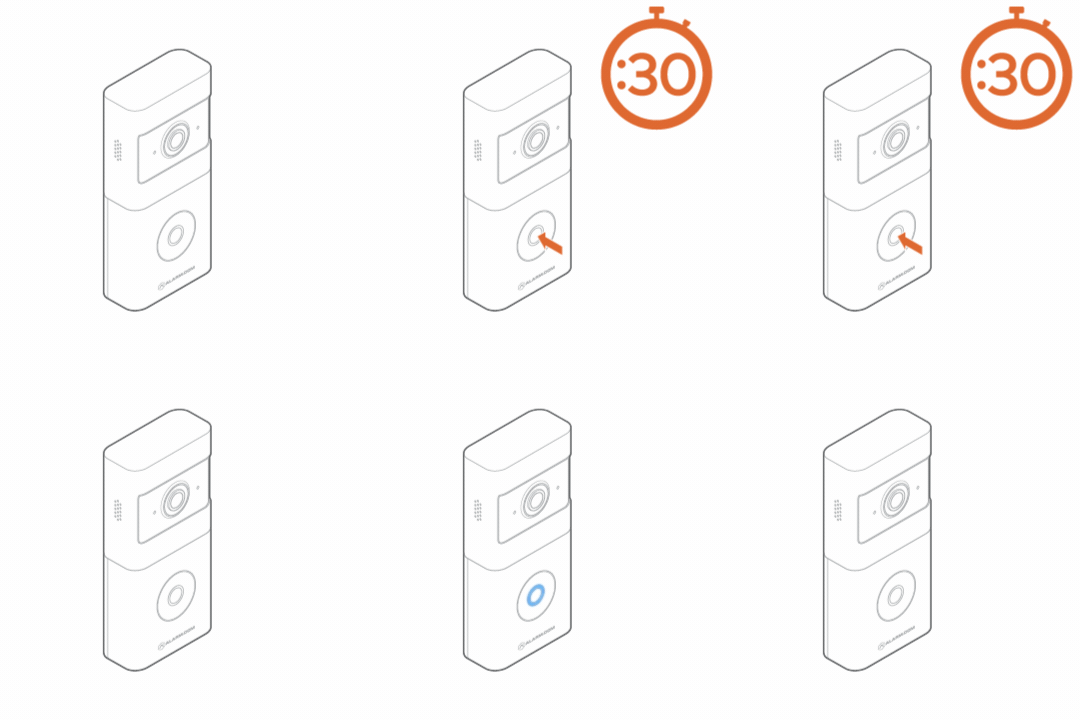
To enable WPS mode, press and hold the VDB780B doorbell button firmly for greater than 30 seconds. The LED will begin flashing blue.

-
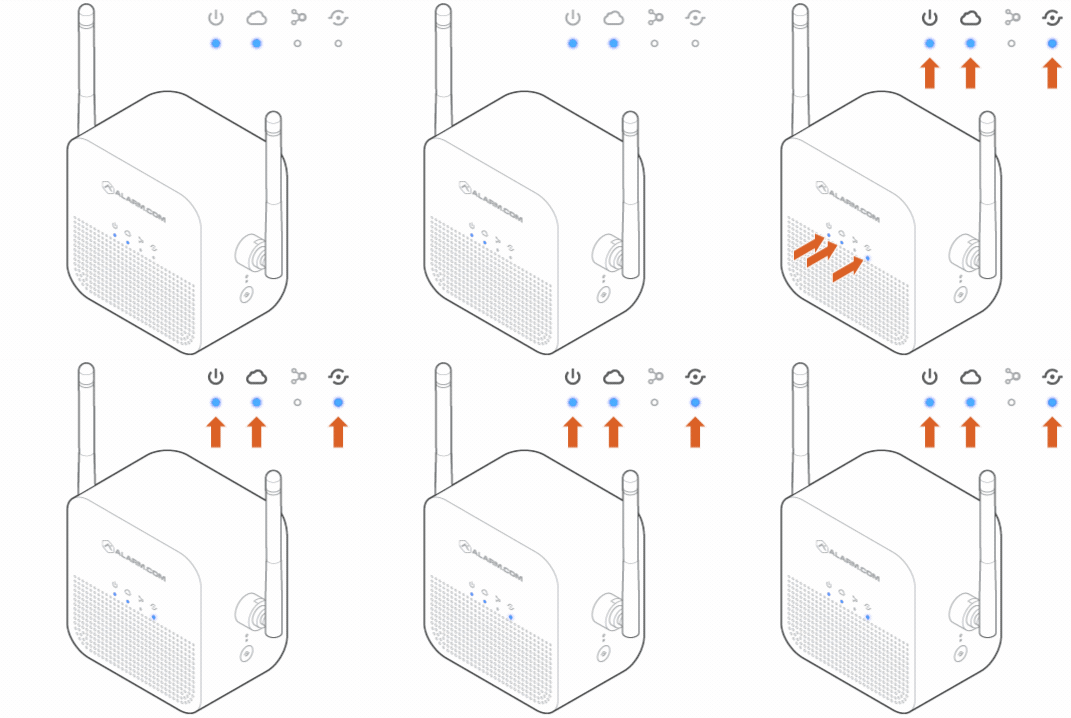
Press and release the WPS button located on the side of the W115C to enable WPS mode. The WPS LED will begin flashing rapidly.

-
If the pairing is successful, the W115C Devices LED will quickly blink 3 times, and the VDB780B LED will begin blinking red and then turn solid green.
Connect the Wireless Video Doorbell to the same network as the IQ Panel 4/Hub/NS:
The VDB780B does not use the IQ Panel 4, IQ Panel 4 Hub, or IQ 4 NS panel as an access point but works in tandem with it as long as both devices are on the same network.
Note: The panel must be installed first. The panel must also be on firmware version 4.5.0+
Using AP Mode:
- The camera is in Access Point (AP) mode when the button LED is blinking white. If necessary, access AP mode by holding down the doorbell button for 46-60s and release when the LED turns to blinking white.
- Using a Wi-Fi-capable device (e.g., smartphone or computer), find and connect to the camera’s network; the SSID should have the format ADC-VDB780B (XX:YY:ZZ) where XX:YY:ZZ is the last 6 characters of the MAC address, which is printed on the included reference card.
- On the same device, open a web browser and enter http://vdb780binstall or 192.168.1.1 in the web address field. Follow the on-screen instructions to add the ADC-VDB780B to the same network as the IQ panel.
- Verify the LED turns solid green, indicating the connection is complete.
Using WPS Mode:
- Put the router the IQ panel is connected to into WPS mode. This will depend on the model of the router.
- Put the VDB780B doorbell into WPS mode by pressing and holding the doorbell button firmly for greater than 30 seconds. The LED will begin flashing blue.
- If the pairing is successful, the the VDB780B LED will begin blinking red and then turn solid green.
Enroll the Wireless Video Doorbell to the Account
Once the ADC-VDB780B is connected to the ADC-W115C, it can be enrolled to the Alarm.com account using the Alarm.com mobile app, or Alarm.com Website
Alarm.com Mobile App
- Log into the Customer app.
- Tap Video.
- Tap Settings Gear
- Tap Add Video Device.
- Tap ADC-VDB780B.
- Follow the on-screen prompts for installing the video device.
Alarm.com Website
- In an internet browser address bar, enter www.alarm.com/addcamera and log into the customer account. Alternatively:
a. Log into the Alarm.com Website.
b. Click Video.
c. Click Settings.
d. Click Add Video Device. - Find the ADC-VDB780B in the list or enter its MAC address and enter a name for the video device.
- Click Install to begin installing the ADC-VDB780B.
- Follow the on-screen prompts for installing the video device.