How To Install the Alarm.com Commercial Stream Video Recorder (ADC-CSVR2000P/2008P/2016P)

Pre-installation checklist

  • Pro Series CSVR (included)
  • A display with an HDMI input (optional)
  • An HDMI cable (optional)
  • AC power adapter (ADC-CSVR2000P)
  • Power cord (ADC-CSVR2008P/ADC-CSVR2016P)
  • An Ethernet Cat5e cable (included)
  • USB Keyboard and Mouse (optional)
  • Rack mount ears and screws (included, for rack installations)
  • Dedicated network switch (recommended for ADC-CSVR2000P)
  • Ethernet connection to broadband internet (Cable, DSL or Fiber Optic)
  • Alarm.com customer account with a service package that supports the CSVR
  • Login and password for the Alarm.com account to which you will add the CSVR

Overview

  1. Network LED
  2. Status LED
  3. Power LED
  4. USB port
  5. Power input
  6. Power switch
  7. HD Out ports
  8. USB ports
  9. Client RJ45 port
  10. Camera RJ45 port
  11. RJ45 PoE Ports


Recommended networking diagram for CSVR2000P

Recommended networking diagram for CSVR2008P/CSVR2016P

Commercial Streaming Video Recorder LED Guide

Network LED

LED pattern Description
Blinking green Client uplink active
Not illuminated Client uplink inactive

Power LED

LED pattern Description
Solid green Powered on
Not illuminated Booting or powered off

Status LED

LED pattern Description
Solid green Connected to Alarm.com
Blinking green Local network connection
Solid red No connection
Not illuminated Booting or powered off

Adding the device to the Alarm.com account

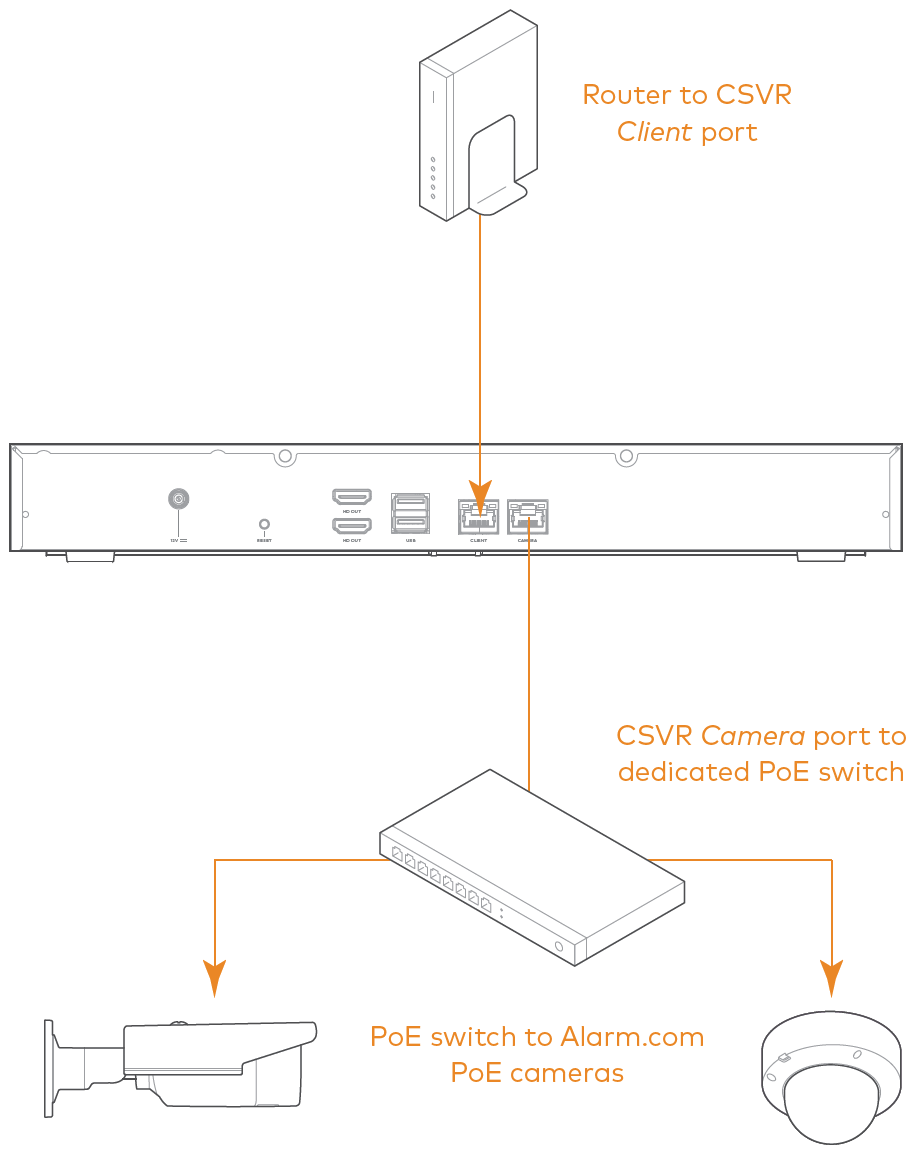
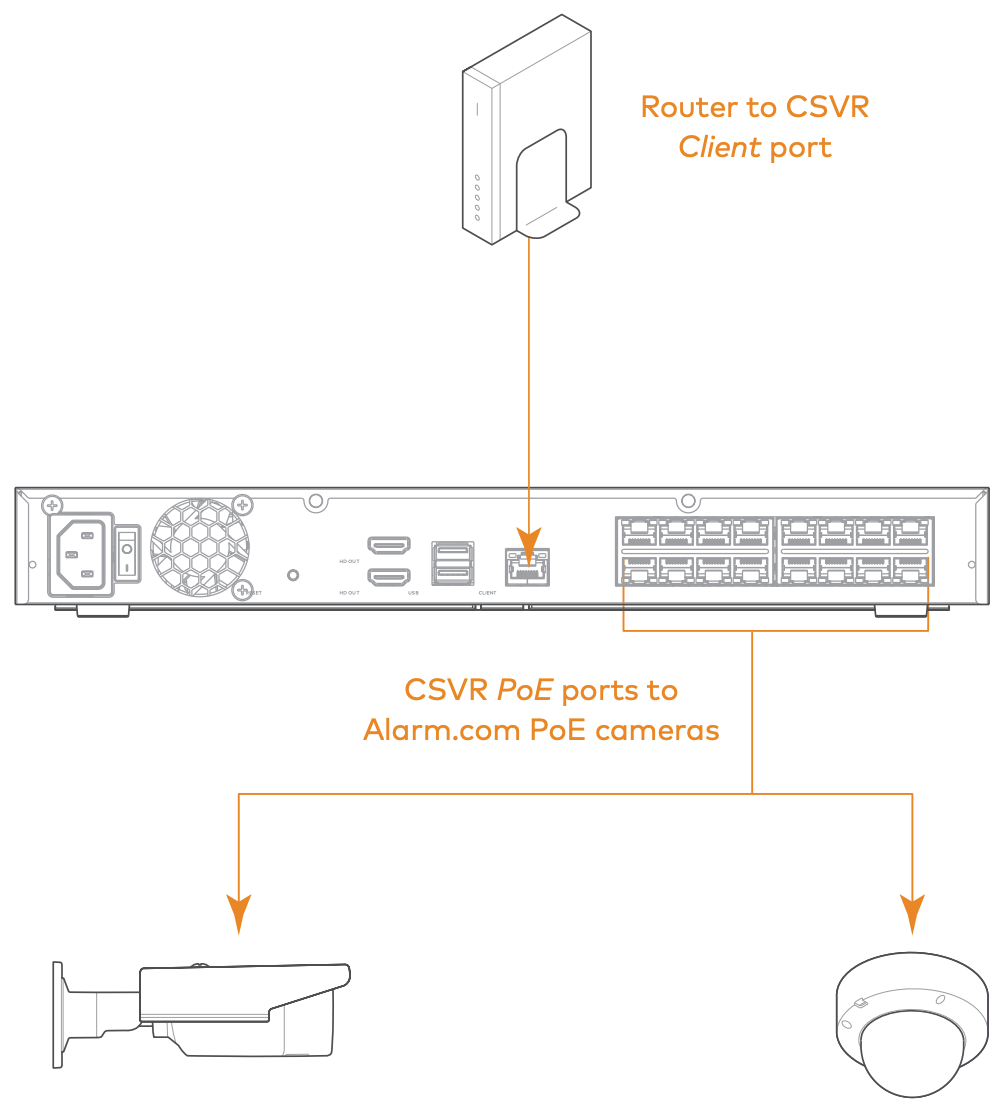
  1. Using an Ethernet cable, connect the device to the network.
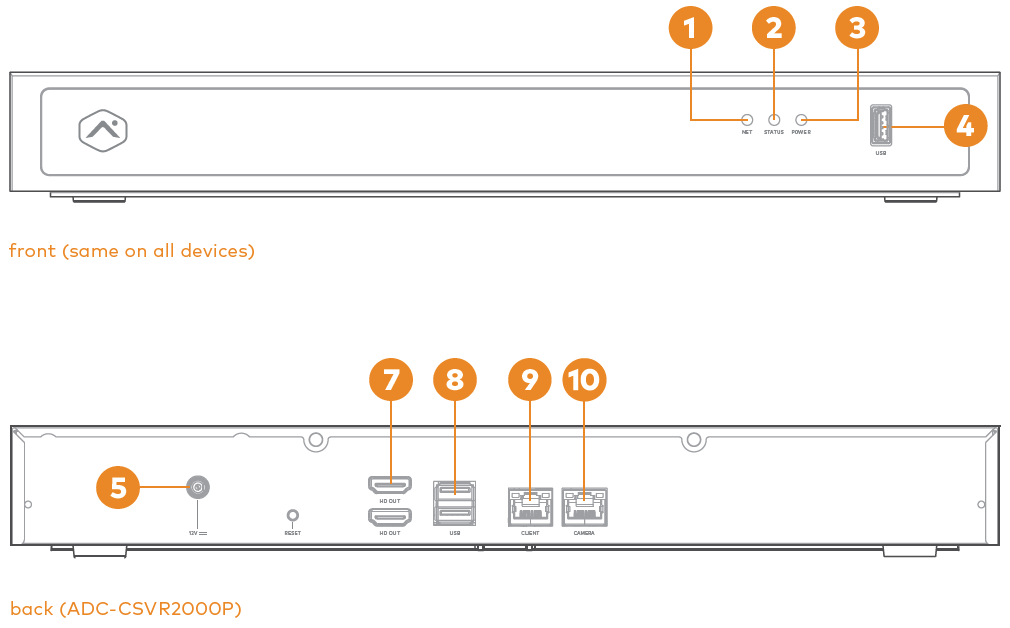
  2. If you wish to use a display with your CSVR, please connect it to one of the HD Out ports using an HDMI cable.
  3. Connect the device to a non-switched, grounded power outlet.
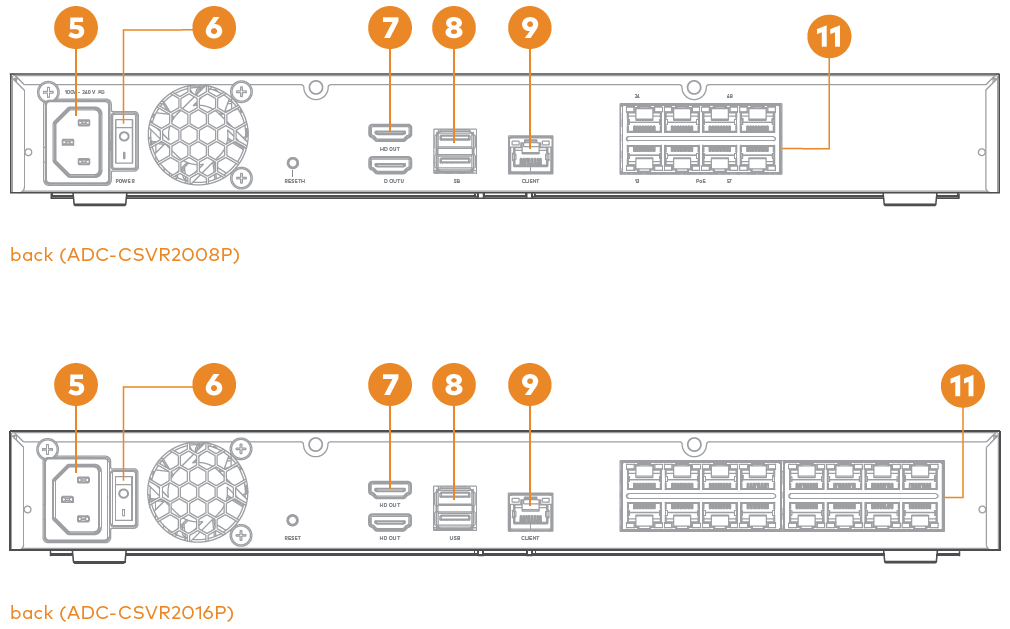
  4. For the CSVR2008P/CSVR2016P: Use the switch on the back of the device to turn on your CSVR.
  5. Wait for the device to boot up. A solid green status LED indicates that the device is ready to be added to the account. P

Alarm.com Website

  1. Using a web browser, enter the following URL: www.alarm.com/addcamera. You will need your username and password to log in to the Alarm.com Website.
  2. Select the CSVR from the video device list or enter its MAC address to begin adding the device. The device’s MAC address is located on the bottom of the device or on the packaging.
  3. Follow the on-screen instructions to finish adding the CSVR.

Mounting the device to a rack (optional)

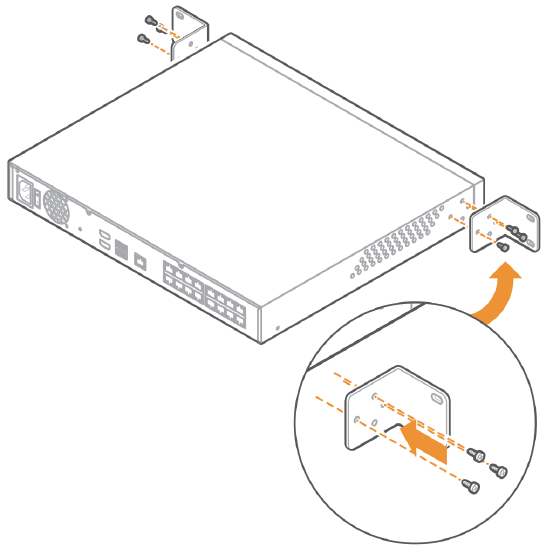
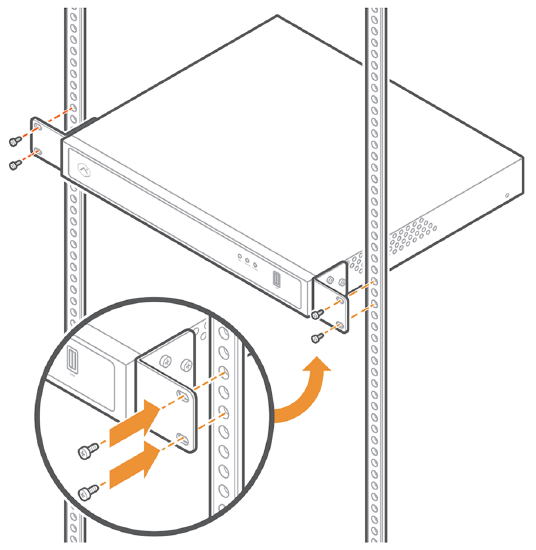
The CSVR20xxP can be mounted to a standard server rack using the included rack mount kit. The rack mounts are designed to fit into a 1U (rack unit) area. The kit includes the screws needed to attach the rack mount ears to the device, but does not include the screws needed to mount the device into a rack.

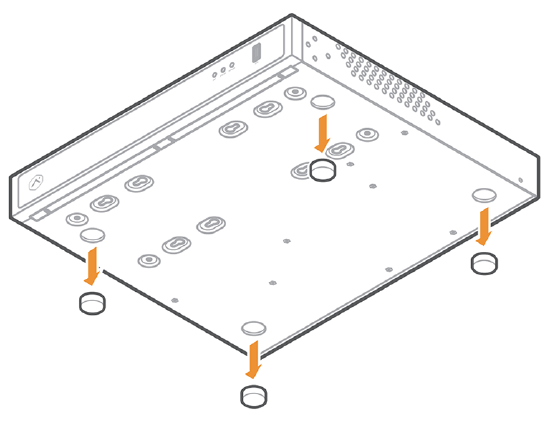
  1. Gently pry off the rubber footpads from the bottom of the device.
    Remove_the_footpads_from_the_CSVR
  2. Using the included screws and brackets, attach a bracket to each side of the device.
  3. Using server rack screws (not included), attach the brackets to each side of the server rack.
  4. Ensure that there is at least 10 in (25 cm) behind the device for proper airflow

How To Associate a video device to an ADC-CSVR2000P/2008P/2016P