Configure Onboard Recording
Install the SD Card
After the SD Card is installed in the camera and you have the correct service package, you can begin recording to it.
Most of the SD card slots are located on the bottom of the camera itself. Make sure the camera is updated to the latest firmware version first before inserting the SD card.
Format the SD Card
Your camera should automatically format and encrypt officially supported SD cards. If it doesn’t, then you will need to format the SD card manually.
To check the status of your SD card (including whether it’s formatted), log into Alarm.com and go to Video > Settings > SD Card Information.
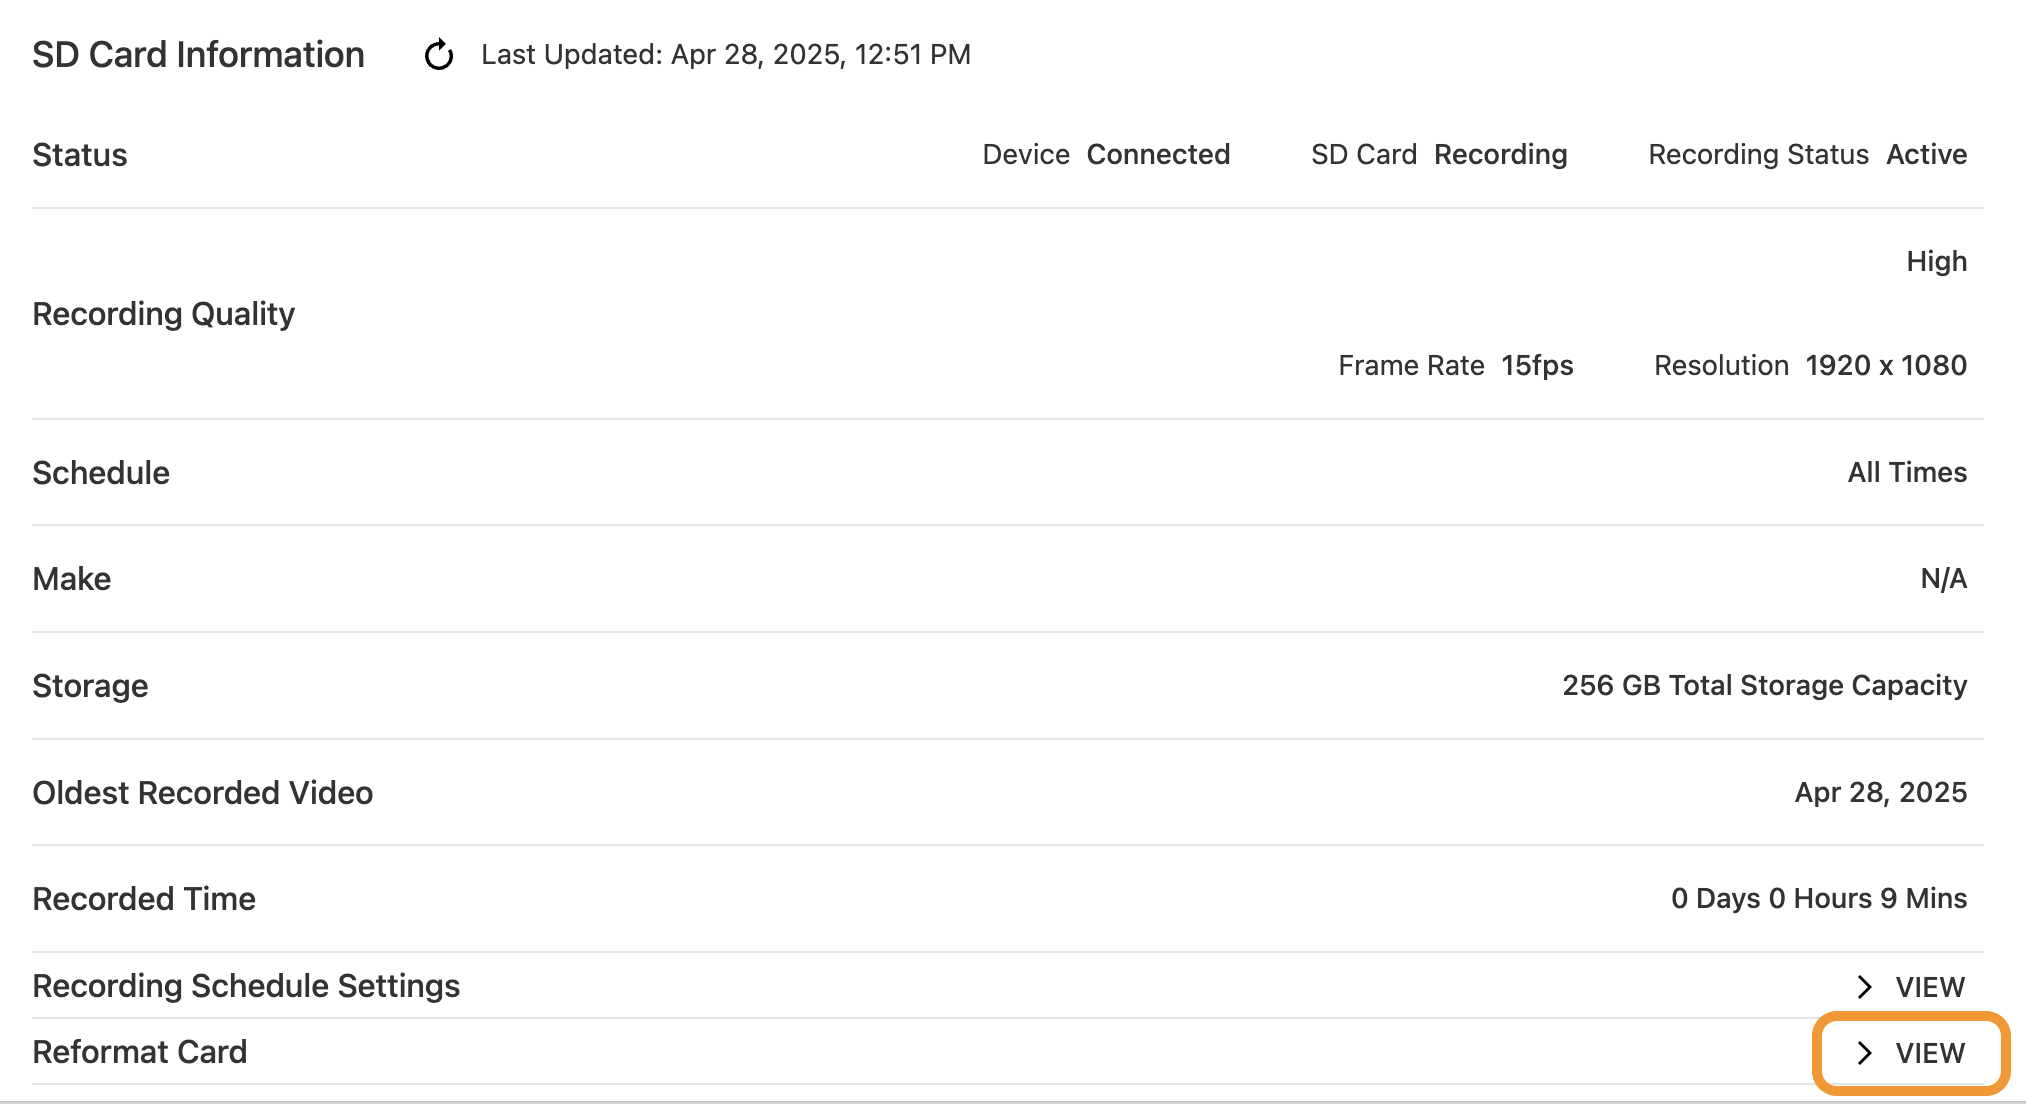
If the SD card isn’t formatted then use the Reformat Card button to format it.
Create the recording rule using the Alarm.com
- Log into the Alarm.com Website.
- Click Video .
- Click Recording Rules .
- Click Local Recordings .
- Click + Add New Schedule .
- Click Onboard .
- Using the Select a camera to record from dropdown menu, select the desired device.
- Using the Select recording quality slider, select the desired quality.
- In Schedule recording time , click to select either At all times or Only during the following times .
- If Only during the follow times is selected:
a. Click to select the desired days to record.
b. Using the Starting at and Ending at dropdown menus, select the period to record in hours.
- To limit the number of days that recordings are kept:
a . Click the Limit the number of days to record toggle switch to enable a limit.
b . Using the dropdown menu, select the desired number of days to limit the recordings to. - Click Save