Getting started with Installation
Required equipment for installation
- Ladder.
- Wi-Fi network name and password.
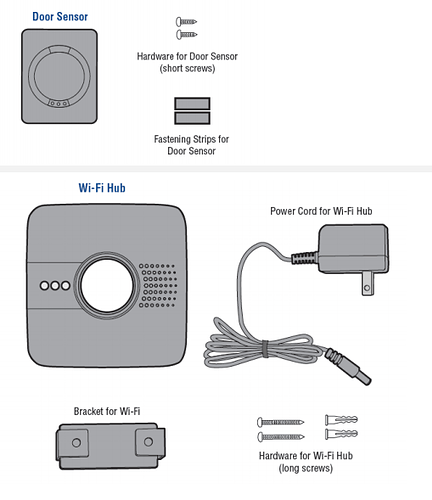
- LiftMaster MyQ Smart Garage Hub (821LM, 821LMB, or MyQ-G0301-D).
- Door sensor (Each Hub supports two door sensors).
- Compatible garage door opener.
- Website access through a laptop, tablet, or mobile device.
1. Install door sensor
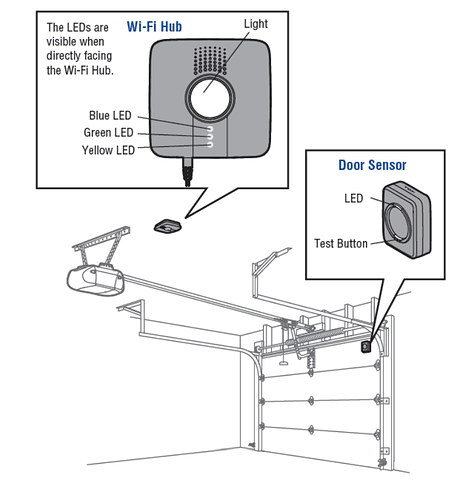
The MyQ Door Sensor communicates the state of the door (open or closed) to the Wi-Fi Hub. This device is a small tilt sensor that is installed on the top panel of the garage door on the inside of the garage. When it is in a vertical position, the sensor reads as Closed , and when it is in a horizontal position it reads as Open .
The MyQ Door Sensor uses a 3 volt CR2450 Lithium battery. Battery level is measured by the 821LM as the number of cycles (up and down) that the sensor has transmitted since it was first learned into a MyQ Smart Garage Hub. The MyQ Garage Door Sensor reports low battery at 7,000 cycles. It typically stops functioning due to battery depletion after about 10,000 cycles.
The sensor communicates with the hub via Bluetooth. This gives it an operating range of about 30 feet from the hub.
Important : The door sensor must be mounted prior to connecting the Wi-Fi Hub to Alarm.com.
There are two Door Sensor installation methods:
Install the door sensor using fastening strips:
- Position the door sensor vertically and attach to a clean, dry location on the top panel of the garage door with fastening strips (provided).
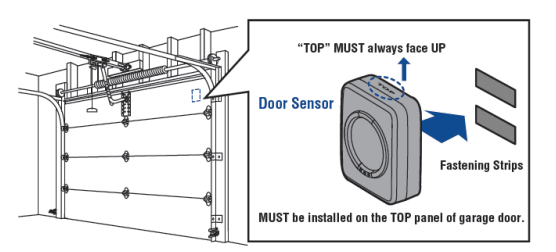
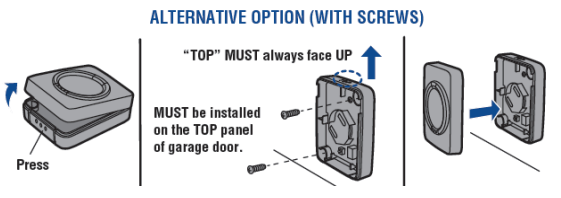
Install the door sensor using screws:
- Press in the bottom of the door sensor and remove the front cover.
- Position the door sensor vertically and attach to the top panel of the garage door with screws (provided).
- Replace the front cover.
2. Mount the MyQ Smart Garage Hub
Note : Final positioning can wait until after setup is complete. If chosen to mount the Wi-Fi Hub first, write down the serial number on the back of the hub to be used later.
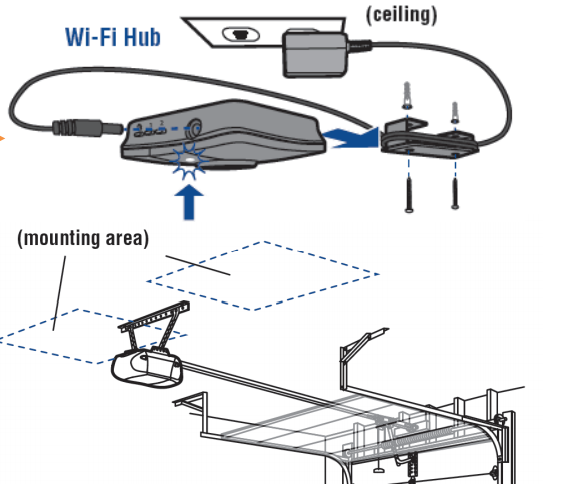
- Install the bracket for Wi-Fi Hub on the ceiling near the garage door opener.
- Use the bracket as a template and mark holes for the bracket.
- Drill 5/32” pilot holes and install the bracket using provided hardware. Be sure the Wi-Fi Hub is visible when standing in the doorway of the garage so that users can see the flashing light when the door is closing.
- Slide the Wi-Fi Hub on to the bracket.
- Connect to AC power.
- The LEDs blink momentarily to indicate a successful power up.
Note : MyQ technology has a range of 1,500 feet (open field).
Important : The Wi-Fi hub must be positioned so that the light on the hub is visible from the doorway of the garage.
