How to Install the nami Alarm System
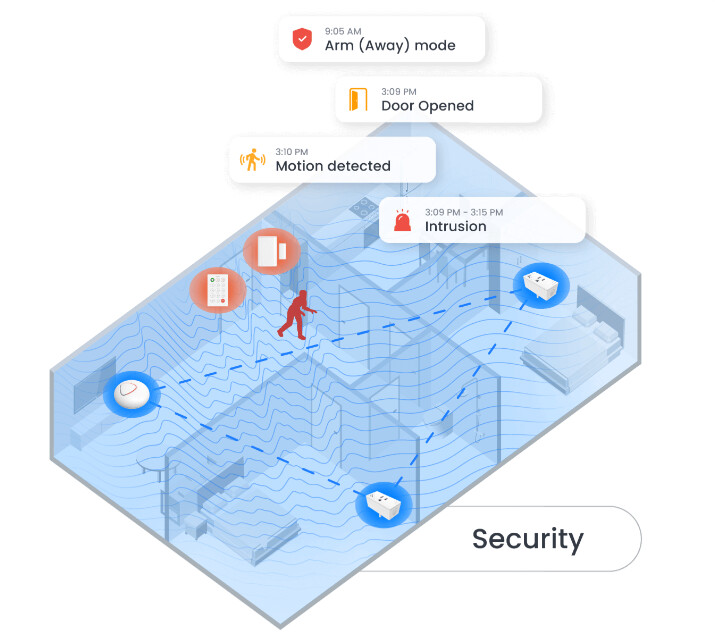
This guide walks you through setting up your nami Alarm 10 kit with your Alarm.com account. The nami system uses Wi-Fi sensing technology — no traditional panel required. When installed, it works just like a standard security system: arming, disarming, detecting intrusion, and sounding an alarm when needed.
What’s in the Box
The nami Alarm 15 kit includes:
- 1 nami Alarm Pod (the hub and siren) + power adapter
- 1 nami keypad
- 1 nami door sensor
- 1 nami SensePlug (Wi-Fi motion sensors that plug into outlets)
- 1nami PIR motion detector
Before You Start
Make sure you have the following ready:
- The Alarm.com Customer app installed on your phone (iOS 16+ or Android 9+)
- Your phone connected to the same Wi-Fi network you want the Nami devices to use
- Bluetooth turned on on your phone
- Your Alarm.com account login credentials
Step 1: Open the Alarm.com App and Start Device Enrollment
- Log in to the Alarm.com Customer app.
- Tap the + (Add) button.
- Tap Add Device.
- Tap Sensor.
- Tap Next to begin the Nami enrollment flow and continue through the introductory screens.
- On the Let’s Get Started screen, tap Next.
- When asked what you are setting up, tap Alarm 10.
Step 2: Create or Select an Area
An “Area” is the zone your sensors will cover (similar to a room or floor).
- Select an existing area or tap to create a new one.
- If creating a new area, give it a descriptive name like First Floor or Living Room, then tap Create Area.
Note: Each area supports a maximum of 4 activity sensors (Alarm Pod + SensePlugs combined).
Step 3: Set Up the Alarm Pod
The Alarm Pod is the heart of the system — it acts as the siren and main hub.
- When prompted, tap Next on the Add Alarm Pod screen to open the QR code scanner.
- Scan the QR code on the back of the Alarm Pod (behind the plastic cover).
- After scanning, plug the Alarm Pod into power. It should pulse dark blue to indicate it is in pairing mode.
- Enter a name for the Alarm Pod when prompted.
- Once Bluetooth pairing is complete, select your Wi-Fi network from the list and enter the password.
Important: The Alarm Pod must connect to the same Wi-Fi network your phone is currently using. Double-check your phone’s Wi-Fi connection before proceeding.
The app will display a progress screen while the device connects. Once connected, tap Next to continue.
Step 4: Set Up the SensePlugs
SensePlugs are Wi-Fi motion sensors that plug into standard wall outlets. You will enroll two of them.
For each SensePlug:
- Review the placement tips on screen, then scan the QR code on the unpowered SensePlug.
- Plug the SensePlug into a wall outlet. It should pulse dark blue.
- Enter a name for the SensePlug when prompted.
- Connect it to the same Wi-Fi network as the Alarm Pod.
- The app will confirm successful enrollment and show kit progress.
Repeat these steps for the second SensePlug.
Placement tip: For best performance, place SensePlugs within 10 to 30 feet of each other and the Alarm Pod.
Step 5: Set Up the Door Sensor
- Follow the on-screen placement tips for the door sensor.
- Scan the QR code on the door sensor.
- While the sensor is enrolling, press the top button once (a short, firm press — not a long press). The sensor should pulse white while in enrollment mode.
- After it enrolls, follow the in-app instructions to physically install the sensor on your door.
Step 6: Set Up the Keypad
- Follow the on-screen placement tips for the keypad.
- Scan the QR code on the keypad.
- While the keypad is enrolling, press the [0] button once.
- After enrolling, follow the on-screen instructions to install the keypad, then tap Complete Installation.
- Follow the prompts to create a PIN for the keypad.
Step 7: Learn Your Security Modes
After installation, the app will walk you through the available security modes. You can control these from the keypad or the Alarm.com app.
| Mode | What It Does |
|---|---|
| Arm (Away) | Triggers an alarm if the door opens OR motion is detected |
| Arm (Stay) | Triggers an alarm if the door opens; motion inside does NOT trigger the alarm |
| Disarm | No alarms triggered; motion is still monitored |
| Panic Alarm | Immediately triggers an alarm — keypad only (hold SOS button for 2 seconds) |
Using the keypad:
- To Arm (Away): Enter your PIN, then press the Arm (Away) button (upper right)
- To Arm (Stay): Enter your PIN, then press the Arm (Stay) button (upper center)
- To Disarm: Enter your PIN, then press the Disarm button (upper left)
- To trigger a Panic Alarm: Press and hold the SOS button for 2 seconds
Step 8: Test Your System
The app will prompt you to run a system test. It is highly recommended to complete this.
- Tap Start Test.
- Test the siren: Tap Sound Siren — you should hear it sound. Tap Next.
- Test the door sensor: Open the door where the sensor is installed and confirm the door icon in the app changes to show it is open. Tap Next.
- Test motion detection: Walk around the room where your SensePlugs and Alarm Pod are installed. Confirm the motion graph in the app changes to reflect your movement.
- Tap Complete Test, then Done.
Verifying Everything Is Set Up Correctly
Once installation is complete, confirm the following in the Alarm.com app:
- The Security System card on the home screen is no longer greyed out.
- Under Manage Devices, you can see your SensePlugs, motion area, and door sensor listed.
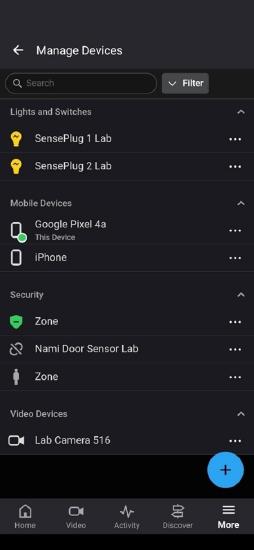
If anything appears missing or offline, try power-cycling the affected device and ensure it is on the correct Wi-Fi network.
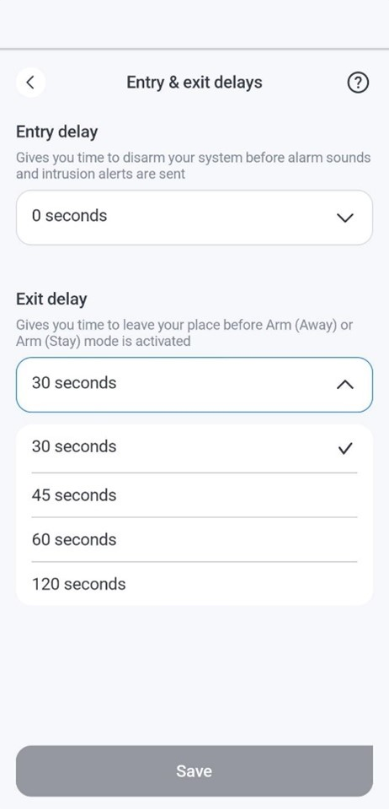
To set the entry and exit delays using the Alarm.com app:
- Log in to the Alarm.com app.
- Tap Security System to open the Security System page.
- Tap the gear icon to open the Security System Settings page.
- Tap Entry & exit delays.
- Use the dropdown menus to select the desired entry and exit delays.
- Tap Save.
Questions?
If you run into any issues during setup, feel free to post in this forum or send us a PM and we will be happy to help!