Making your own Ethernet cable is a handy skill, especially if pre-made cables aren’t the right length for your camera or router setup. Here’s a simple walkthrough for putting together a standard (straight-through) Ethernet cable.
What You’ll Need
- Bulk Ethernet cable (Cat5e is fine for most home setups; Cat6 costs a bit more but offers better performance)
-
- RJ-45 connectors sized for your cable type
-
- An RJ-45 crimping tool (some have a built-in cutting blade)
-
- Optional: a cable tester to confirm your finished cable works
Video How-To
Steps
- Strip the outer jacket. Using the blade on your crimping tool, cut about an inch of the outer sheathing off the end of the cable or longer if needed, being careful not to nick the inner wires.
- Untwist and separate the pairs. Unwind the four twisted pairs and separate all eight individual wires so you can work with them.
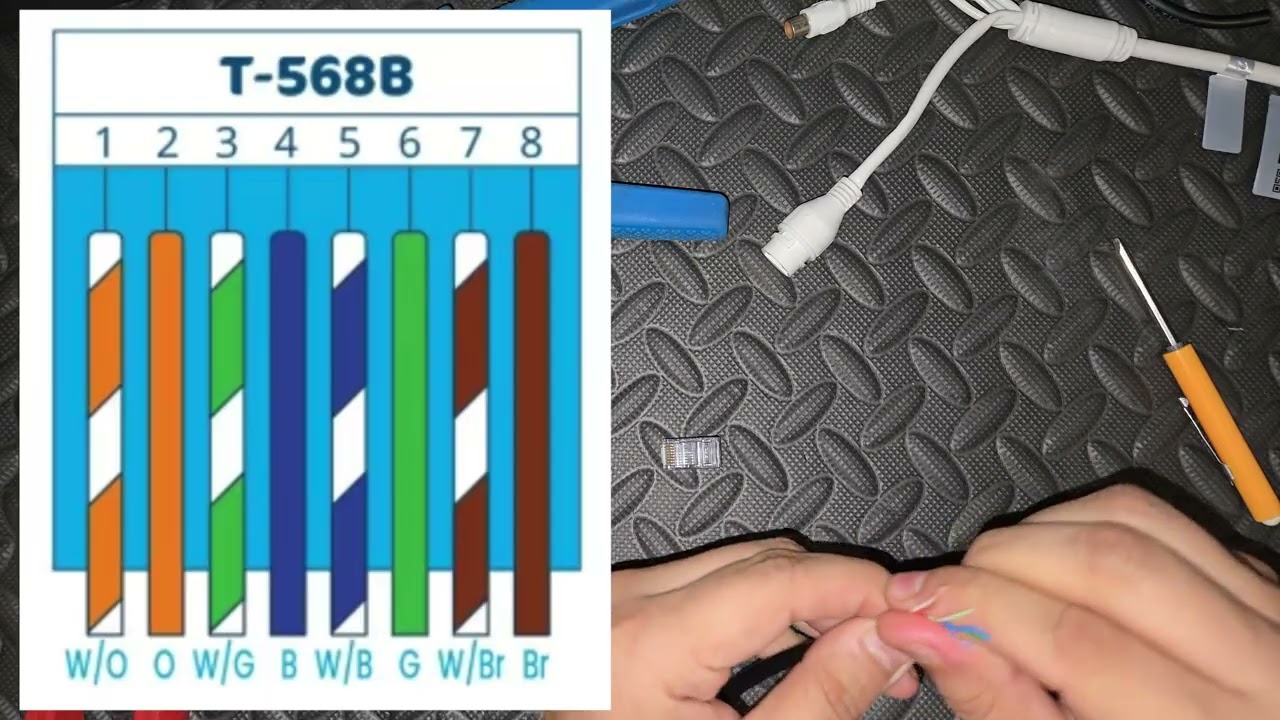
- Arrange the wires in order. Flatten and line up the eight wires side by side in the correct color sequence for a straight-through cable (the standard T568B order is: white/orange, orange, white/green, blue, white/blue, green, white/brown, brown). Getting the order right matters, since it needs to match on both ends.
- Trim Cut off the tips as this makes it easier to pass through the connector.
- Insert into the connector. Slide all eight wires into the RJ-45 connector, keeping them in order. Push firmly until the jacket sits just inside the back of the connector (not sticking out, and not stopping short).
- Crimp the connector. Place the loaded connector into the crimping tool and squeeze firmly. This drives the internal contacts down into each wire and locks the cable in place. Once crimped, that end is finished.
- Repeat on the other end. For a straight-through cable, follow the exact same wire order on the second end. (A crossover cable would use a different order on this end.)
- Test the cable. Before installing or relying on the cable, use a cable tester to confirm all eight connections are good.
That’s it — once both ends are crimped and tested, your cable is ready to use for your camera or network connection.