Pre-installation checklist
- ADC-V516 camera (included)
- AC power adapter (included)
- 2.4 GHz or 5 GHz Wi-Fi connection to broadband internet
- An Alarm.com account with a service package that supports video
- Surety Protect, Complete, Cam, or a security plan with video add-on.
- A computer, tablet, or smartphone with Wi-Fi is required if the router does not have the Wi-Fi Protected Setup (WPS) feature
There are two options for connecting the ADC-V516 to the Internet: Access Point (AP) mode and Wi-Fi Protected Setup (WPS) mode. Use WPS mode if the router has WPS enabled.
In the box
- ADC-V516 camera
- Mounting bracket
- Power adapter
- Installation guide
- Wall anchors & screws (x3) (use 3/16" or 5 mm drill bit and in length 23 mm)
Installation
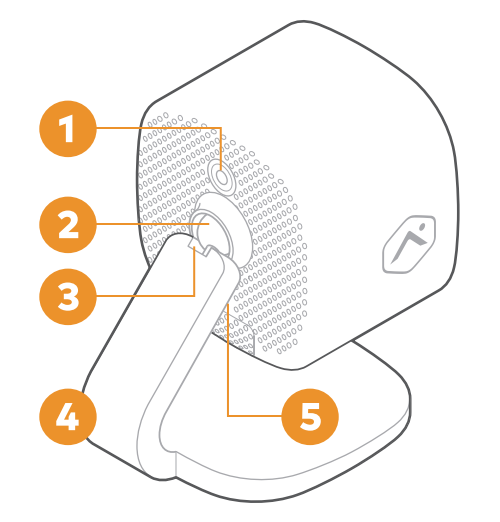
- DC power connector
- Friction ball joint
- Friction hinge joint
- Base
- Reset / WPS button
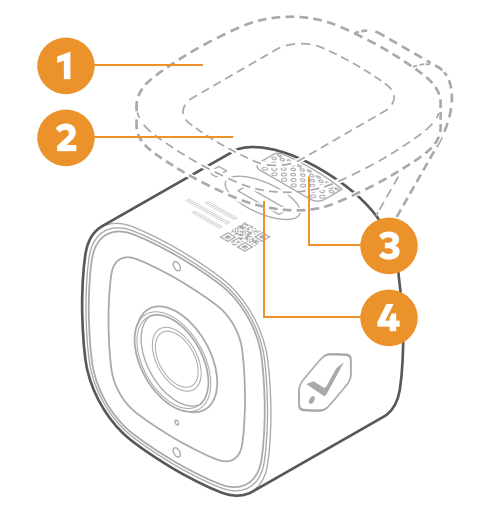
- Rubber pad
- Mounting recess
- Speaker
- Micro SD card slot
Connect the camera to the Wi-Fi network
AP Mode
- Connect the camera’s AC power adapter and plug it into a non-switched outlet.
- The camera’s LED will begin to blink white. If the LED is not white after 2 minutes, hold down the reset button and release when the LED begins to blink white (about 6 seconds).
- On an Internet-enabled device, connect to the Wi-Fi network ADC-V516 (XX:XX:XX) where XX:XX:XX is the last six characters of the ADC-V516’s MAC address, which is located on the camera or on the packaging.
- On the same device, open a web browser and enter http://v516install in the URL field. Follow the on-screen instructions to add the ADC-V516 to the Wi-Fi network. The LED will be solid green when the connection is complete.
- To complete the installation, see the steps below.
WPS Mode
- Connect the camera’s AC power adapter and plug it into a non-switched outlet.
- Hold down the Reset button on the back of the camera and release when the LED begins to blink blue (about 3 seconds).
- Activate the WPS mode on the router. The camera will begin to connect to the Wi-Fi network. The LED will be solid green when the connection is complete.
- To complete the installation, see the steps below.
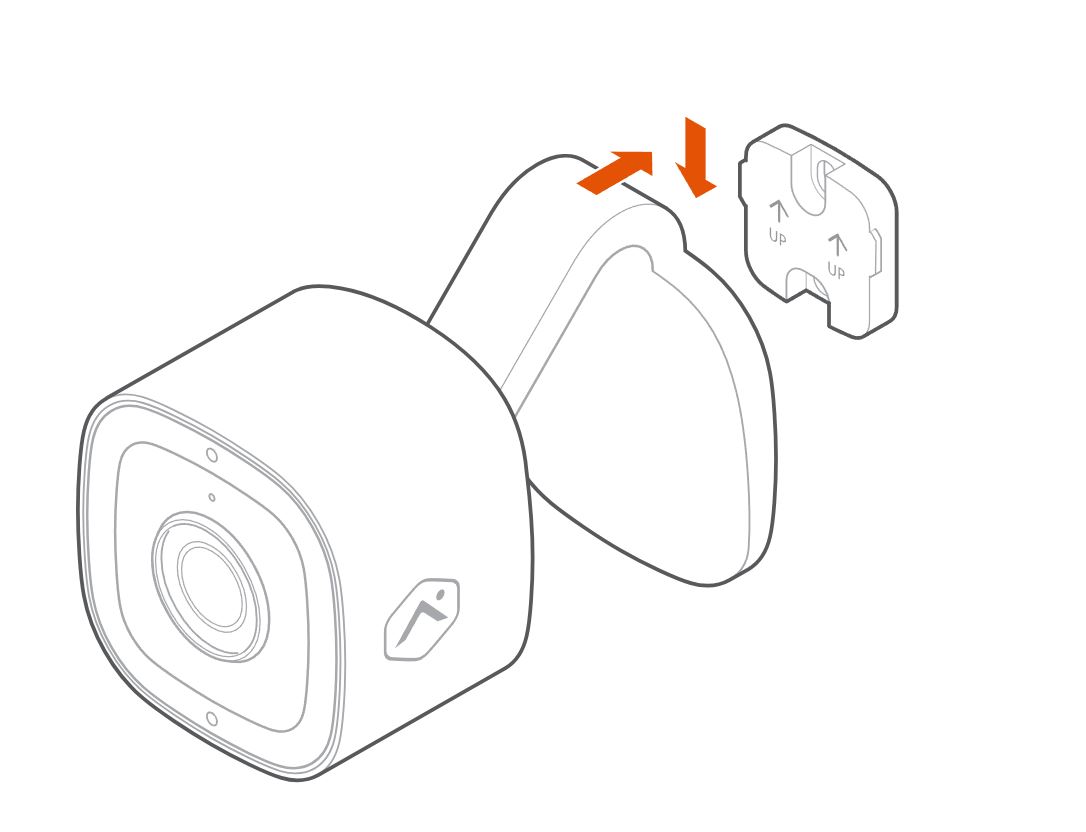
Mount the camera in its final location
-
Bring the ADC-V516 camera, mounting bracket, power adapter, and wall anchors and screws (use a 3/16" or 5 mm drill bit) to the camera’s desired location. This location should be near a power outlet and within range of the Wi-Fi network.
-
Use the mounting bracket to mark the screw holes on the wall. Drill holes at the marked locations and insert the wall anchors. Attach the mounting bracket to the wall using the screws provided.
-
Attach the camera to the mounting bracket.
-
Connect the camera’s DC power adapter and plug it into an outlet.
-
Adjust the camera angle as needed using the friction ball joint and hinge joint and ensure the camera is securely mounted.

Add the device to an account
To add the device to an account using the Alarm.com app:
To add the device to an account using the Alarm.com website:
Status light guide
| LED pattern | Description |
|---|---|
| Off | Power off |
| Solid green | Connected to Alarm.com |
| Blinking green | Local network connection |
| Blinking red and green | Reverting to factory default settings |
| Blinking red | Power on, camera booting |
| Solid red | No local or Internet connection |
| Blinking blue | WPS mode |
| Blinking white | Wi-Fi Access Point mode |
Troubleshooting
- If there are issues connecting the camera to the account, power cycle the camera and try again.
- If issues persist, press and hold the Reset button located on the bottom of the camera until the LED is blinking green and red (about 15 seconds), then release the button. The camera will reboot with factory default settings.
Important: If the camera was previously installed to an Alarm.com account, it will need to be deleted before it can be installed again.