AP Mode
Access Point (AP) mode allows for devices to be added to a secure home wireless network by connecting to the camera’s temporary access point using a Wi-Fi enabled device.
AP mode installation steps
Activate AP mode on the camera:
- Connect the camera’s AC adapter and plug it into a non-switched outlet. The camera’s LED illuminates red while it is booting up.
- Wait for the camera to finish its startup process. This should take approximately 2 minutes for most Alarm.com video cameras.
- Press and hold the camera’s WPS button for 5 to 7 seconds. Release the button immediately after the camera’s LED starts to flash white.
Note: While holding the button, a blue LED flashes to indicate WPS mode, then a white LED flashes to indicate AP mode.
Connect the camera to the Wi-Fi network:
- Using a computer, smartphone, or tablet, connect to the Wi-Fi network named ALARM (##:##:##). The numbers in parentheses are the last six digits of the camera’s MAC address.
- On the same device, open a web browser and enter the web address for the video device being connected (e.g., http://v723install or http://522irinstall) or 192.168.1.1 in the address bar. Follow the on-screen instructions to add the camera to the Wi-Fi network.
- The user interface and steps vary between video devices.
User interface version One

- Click to select the desired language.
- Click Scan for Wi-Fi Networks.
- Click to select the user’s Wi-Fi network. The Wi-Fi name automatically populates in the SSID field.
- In Security Key, enter the password of the Wi-Fi network. This is case-sensitive.
- Click Save.
- Once the video device’s status LED turns solid green, begin enrollment. If the video device status LED does not turn solid green, double-check the Wi-Fi name and password and try again or try an alternative connection option.
User interface version Two
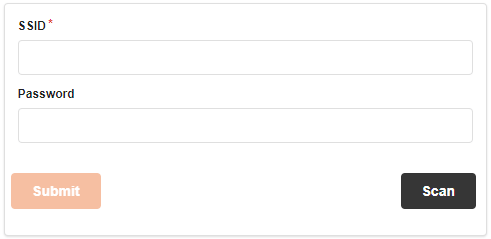
- Click Scan.
- Click to select the desired network. The Wi-Fi name automatically populates in the SSID field.
- In the Password field, enter the password of the Wi-Fi network. This is case-sensitive.
- Click Submit.
- Once the video device’s status LED turns solid green, begin enrollment. If the video device status LED does not turn solid green, double-check the Wi-Fi name and password and try again or try an alternative connection option.
Enroll the camera to the Alarm.com account:
Once the video camera is connected to the Wi-Fi Network, associate the camera to the Alarm.com account using the mobile app Video Installation Wizard or Alarm.com Website (www.alarm.com/addcamera)