The video frame rate determines how smooth the playback appears. The higher the number, the smoother the video. Live video and saved video frame rates can differ between each other.
Live video frame rate
Alarm.com video devices stream live video with the highest frame rate the network and video device permit.
On a local area network (LAN), the maximum FPS may be achieved but can be lower if the available bandwidth is too low, shared by multiple cameras, or shared by multiple simultaneous viewers. Reducing resolution or image quality may increase the FPS when viewing live video from remote connections.
To adjust live video image quality and resolution using the Alarm.com Website:
- Log into the Alarm.com Website.
- Click Video .
- Click Settings .
- Using the Video Device dropdown menu, select the desired video device.
- Click Live Video then make the desired changes. The settings available to change vary by video device.
- Click Save .
Saved video frame rate
Users can choose the target frame rate for saved video. The available frame rates can range from 1 FPS to 30 FPS depending on the video device. A Stream Video Recorder (SVR) can match the chosen frame rate of each individual video device. The maximum frame rate an SVR can match is 30 FPS.
Note : Internet speeds, browser performance, and/or bandwidth can affect the quality of the image when viewing from the Alarm.com Website or App. For best results or to see true image quality, it is suggested to download the clip.
To adjust saved video image settings using the Alarm.com Website:
Note : The saved video resolution, image quality, and frame rate settings that the user applies on the video device’s Saved Video settings page are also applied to the video device’s Stream Video Recorder (SVR) recording rule.
- Log into the Alarm.com Website.
- Click Video .
- Click Settings .
- Using the Video Device dropdown menu, select the desired camera.
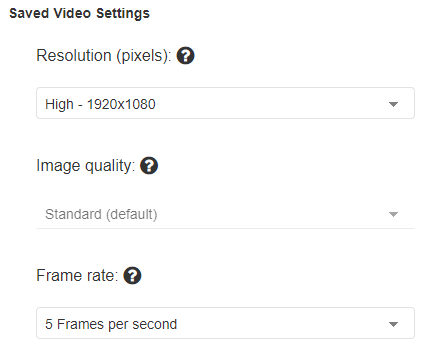
- Click Saved Video then make the desired changes. The settings available to change vary by video device.
-
Using the Resolution (pixels) dropdown menu, select the desired video resolution.
-
Using the Image Quality dropdown menu, select the desired video image quality.
-
Using the Frame Rate dropdown menu, select the desired video frame rate.
-
Note : Some settings cannot be changed on select cameras. If the setting is unavailable, it will be grayed out on the Alarm.com Website.
- Click Save .