Pre-Connection Checklist
This section of the guide covers how to setup the SEM once you have determined that it is compatible with your Vista panel.
Prior to installing the SEM and getting connected to your Alarm.com account, there are a couple steps that must be taken:
- Get access to your Vista panel’s Installer Code
- Enable keypad 8 device Address 23
The Installer Code
The SEM is a bit different when it comes to Alarm.com compatibility. It requires that the user have access to their Vista panel’s Installer Code prior to the creation of their Alarm.com account. This code is necessary as Alarm.com uses this code to access panel programming and read information stored on the panel.
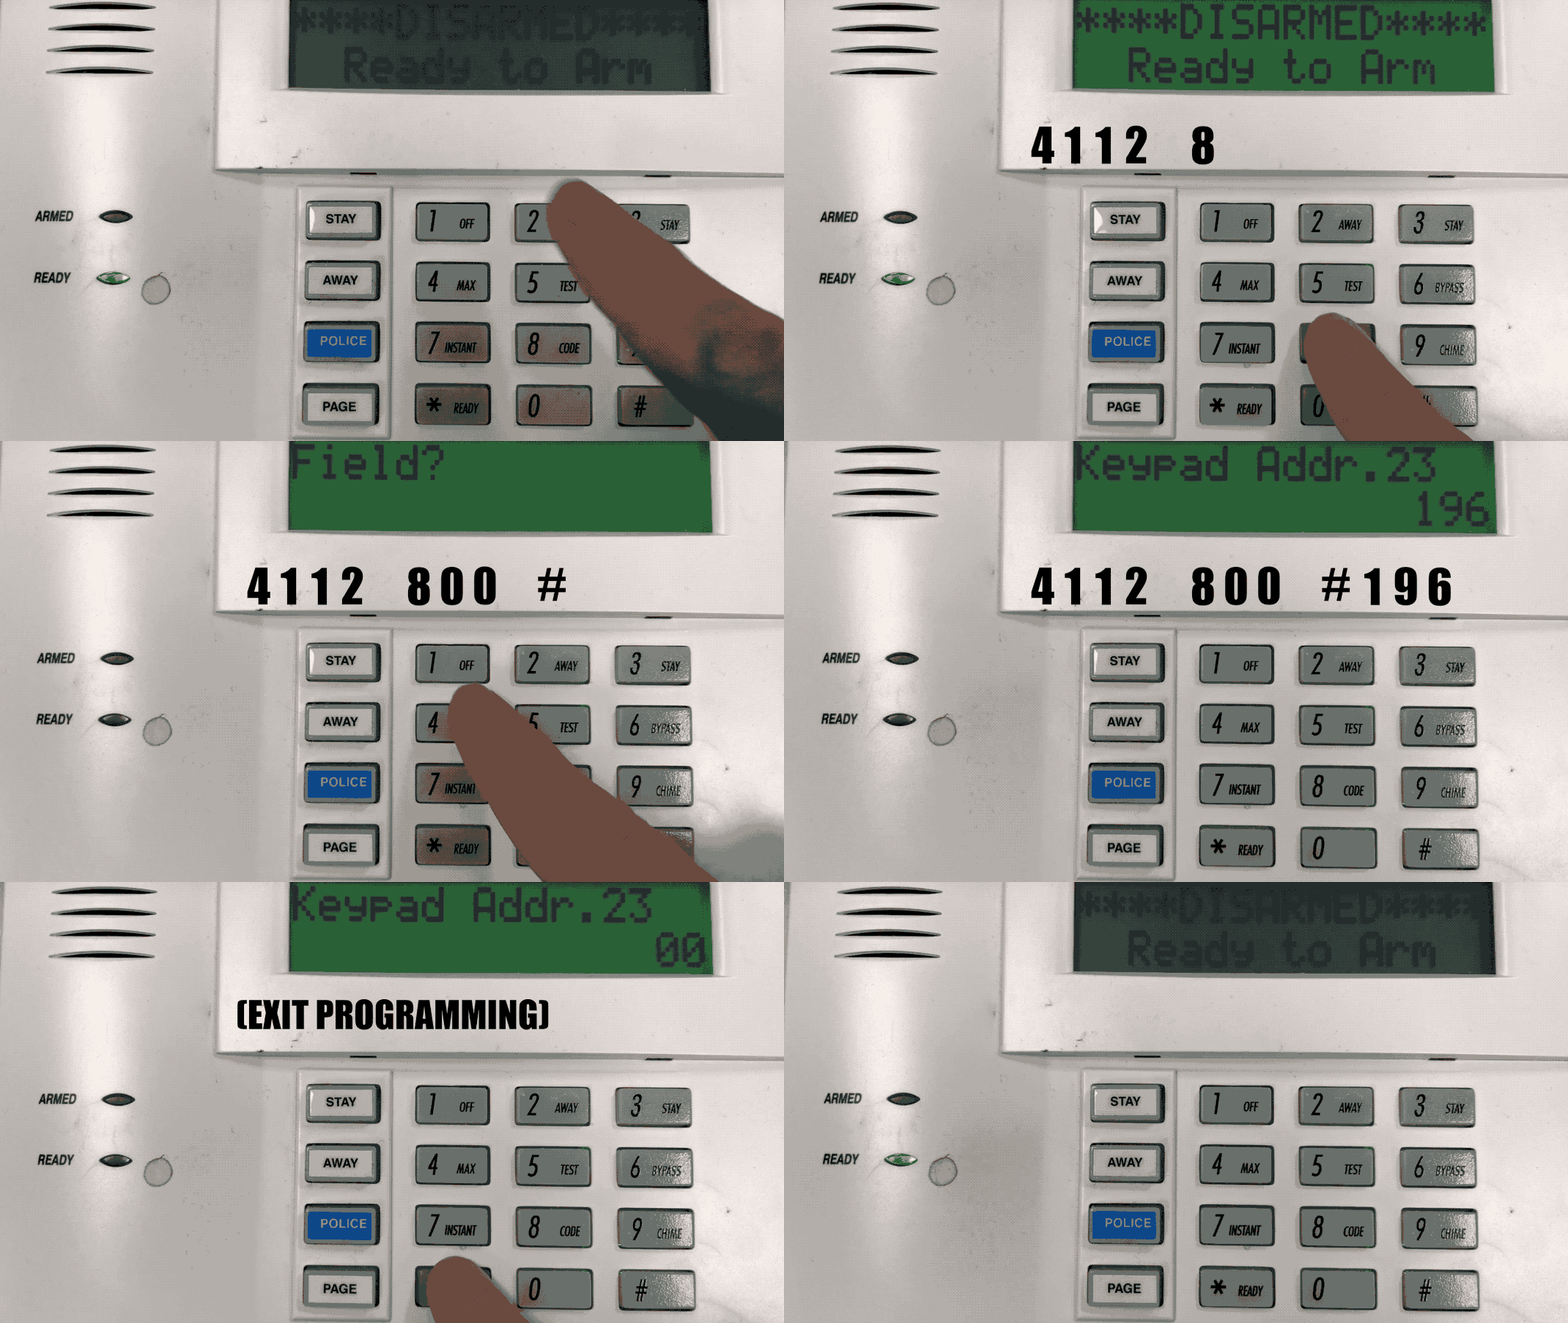
The following video shows how to access programming without the current installer code. The installer code can then be reset to that of your choosing.
Enable keypad 8 device Address 23
The SEM communicates with the VISTA panel as if it is a keypad. By default, the SEM will use Keypad 8 Device Address 23 to communicate. Address 23 must be enabled via panel programming. If the correct keypad address is not enabled, the panel and module cannot communicate properly. This is one of the biggest mistakes when it comes to setting up the SEM, so make sure you follow this step beforehand.
To verify keypad 8 device address 23 using the keypad:
- Enter the installer code.
- Press [800] to enter programming.
- Press [#][196] to go to the keypad options field.
- It should show 01 , then 00 to indicate it is enabled.
- If it is not enabled, enable it using the steps below.
- If address 23 is already in use, see below.
- Press [*][99] to exit programming.

To enable keypad 8 device address 23:
- Enter the installer code.
- Press [800] to enter programming.
- Press [*][196] to edit keypad address 23.
- Press [1][0] to enable the keypad address. The keypad should beep to indicate it was saved.
- It should show 01 , then 00 to indicate it is enabled.
- Press [*][99] to exit programming.
To enable a different keypad address (if address 23 is in use):
In most cases, Address 23 will be available. If another keypad is already connected to Address 23, a different keypad address must be selected for the SEM.
- Identify an available keypad address.
- Enable the address at the keypad by entering the corresponding VISTA programming command using the Keypad address table below.
- Power the system off.
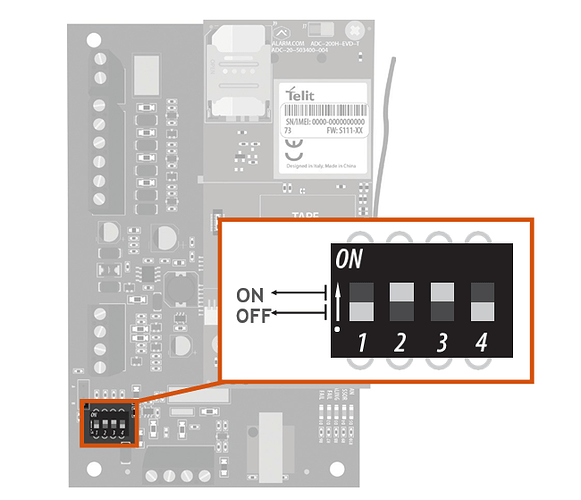
- Adjust the SEM DIP switches on the SEM to match the corresponding keypad address using the Keypad address table
- Power the system on. Verify a zone scan initiates upon power up.
Keypad Address Table
|Keypad Address | DIP Switch Setting | VISTA Programming Menu |
|—|—|—|—|—|
| 17 | None—all OFF | *190 |
| 18 | Switch 4 ON, others OFF |*191 |
| 19 | Switch 3 ON, others OFF | *192 |
| 20 | Switch 3 and 4 ON, others OFF | *193 |
| 21 | Switch 2 ON, others OFF |*194 |
| 22 | Switch 2 and 4 ON, others OFF | *195 |
| 23 | Switch 2 and 3 ON, others OFF | *196 |

