Pre-Installation Checklist
- CSVR126 (included)
- A display with HDMI or VGA input (optional)
- AC power adapter (included)
- An Ethernet/Cat5 cable (included)
- HDMI (included) or VGA cable (optional)
- Ethernet connection to broadband Internet (Cable, DSL or Fiber Optic)
- A computer or mobile device with Internet access
- Dedicated network switch (recommended to connect PoE cameras)
- Login and Password for the customer account to which you will add the CSVR126
- An Alarm.com customer account with a service package that supports an SVR
- SVR is included in the Surety Protect and Surety Complete service plans. Can also be found as an add-on.
Overview
Recommended camera connection
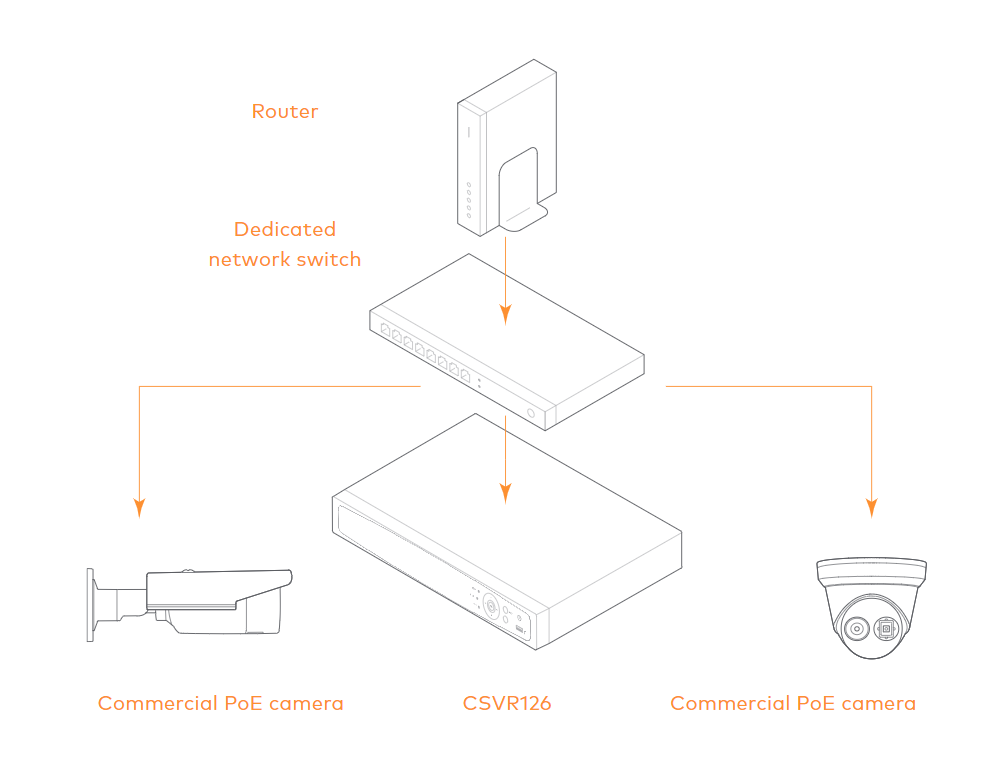
Alarm.com recommends using Alarm.com commercial-grade PoE cameras with the CSVR126. The CSVR126 should be connected to the same network switch as the cameras. While use of Wi-Fi video cameras with the CSVR126 is supported, a PoE connection is recommended for best results.
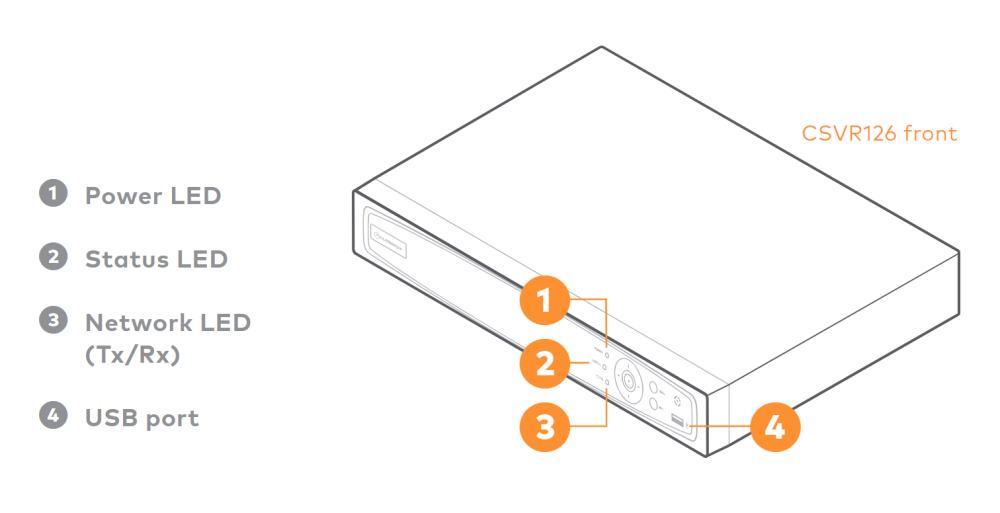
LED guide
Power LED
Solid green- Device powered on
Not illuminated - Device powered offNetwork (Tx/Rx) LED
Blinking green - Active intranet connection
Not illuminated - No active intranet connectionStatus LED
Blinking red - Device active
Not illuminated - Device idle
Adding the Device to an Account
- Using an Ethernet cable, connect the device to the network.
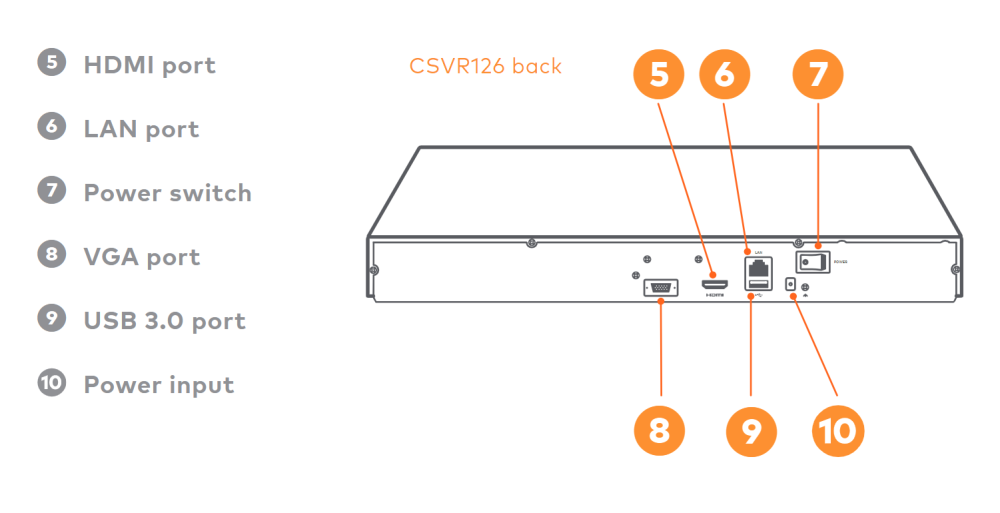
- If you wish to use a display with your CSVR126, connect it now using either the included HDMI cable or a VGA cable.
- Connect the device’s AC power adapter and plug it into a non-switched outlet.
- Using the switch on the back of the device, turn on the CSVR126. The power LED on the front of the device will illuminate. Wait 2 minutes for the device to boot up.
- Add the device to the account using one of the following methods:
Alarm.com Website
- Using a web browser, enter the following web address: www.alarm.com/addcamera.
- Select the CSVR126 from the video device list or enter its MAC address to begin adding the device. The CSVR126 MAC address is located on the bottom of the device or on the packaging.
- Follow the on-screen instructions to finish adding the device.
Alarm.com Mobile App
- Log in to the mobile app
- Tap the navigation menu icon
- Tap + Add Device.
- Tap Video Camera.
- Tap CSVR126.
- Follow the on-screen instructions to finish adding the CSVR126.
After enrolling the CSVR126, you may associate cameras to the device and configure drives and display settings using the Alarm.com website